
The Course Catalogue allows you to showcase a concise overview of your courses, including details such as the course title, image, description, author, pricing, and more. It also enables users to enroll in or access courses directly. Additionally, the catalogue can be filtered to display specific content based on category, certificate availability, author, and more.
In this article, you will learn how to add and customize course cards to your school pages.
Add course cards
The Course Catalogue can be added to any page of your school so users can easily compare courses, bundles, and subscriptions and choose the one that best suits their needs. By default, a system Courses page is included in all schools.
1. Navigate to Website → Design → Edit Website.
2. Choose any page to edit from the Page Manager.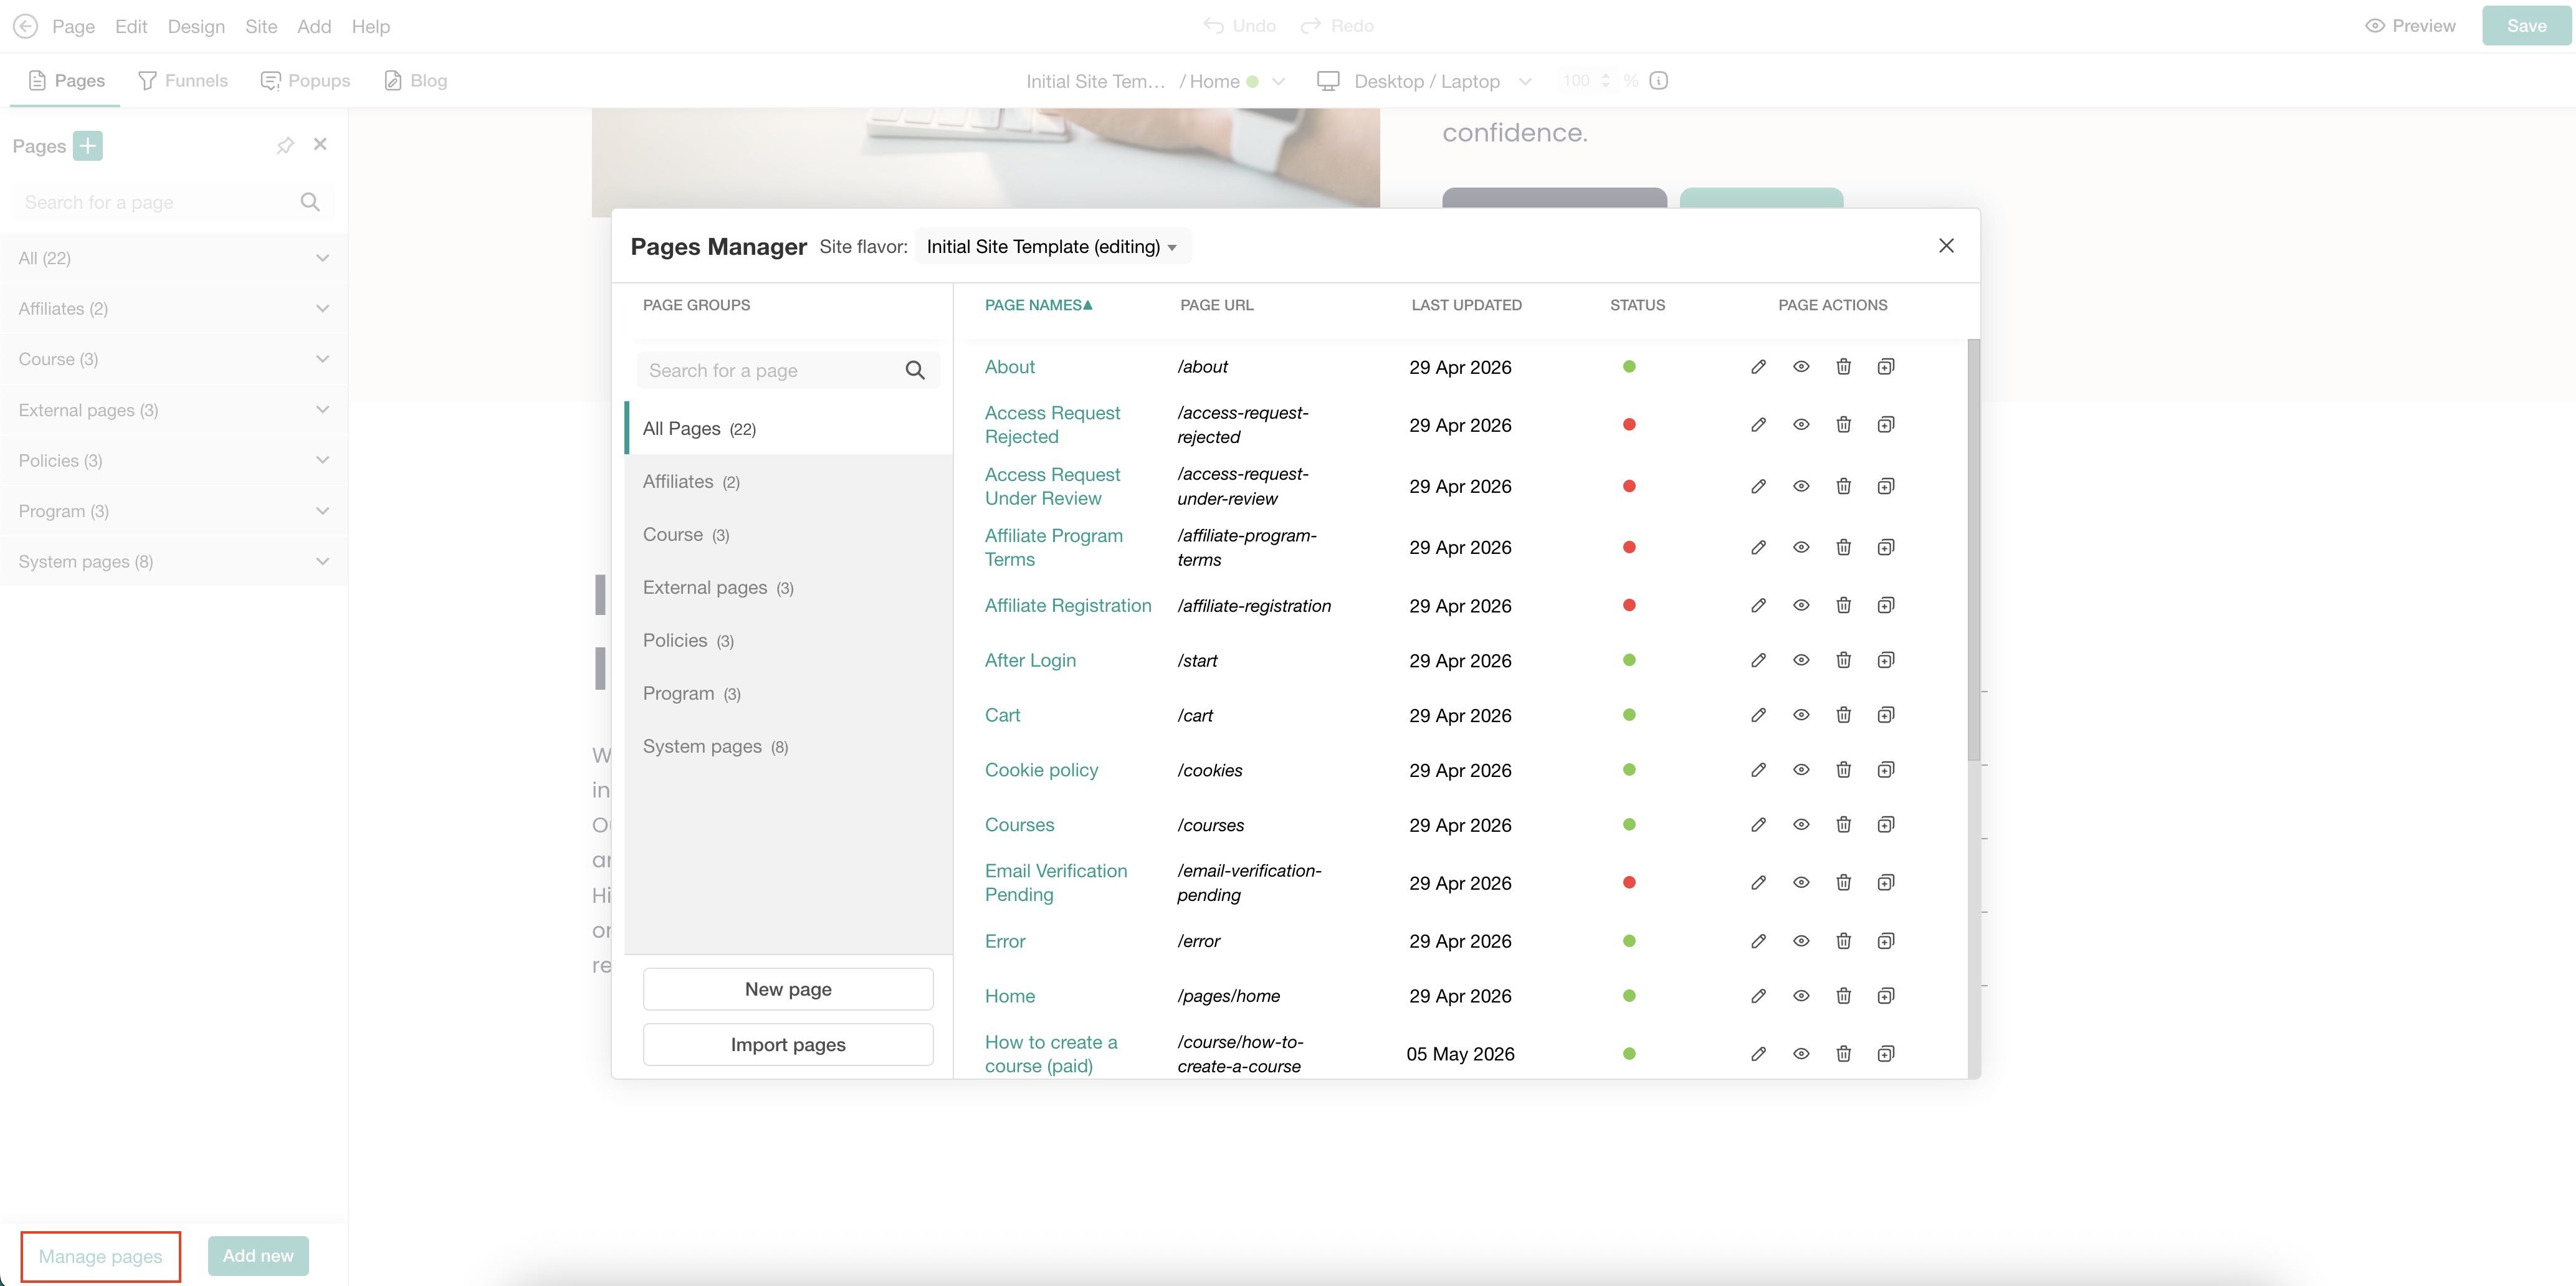
3. Hover over the page and click on the (+) icon to add a section.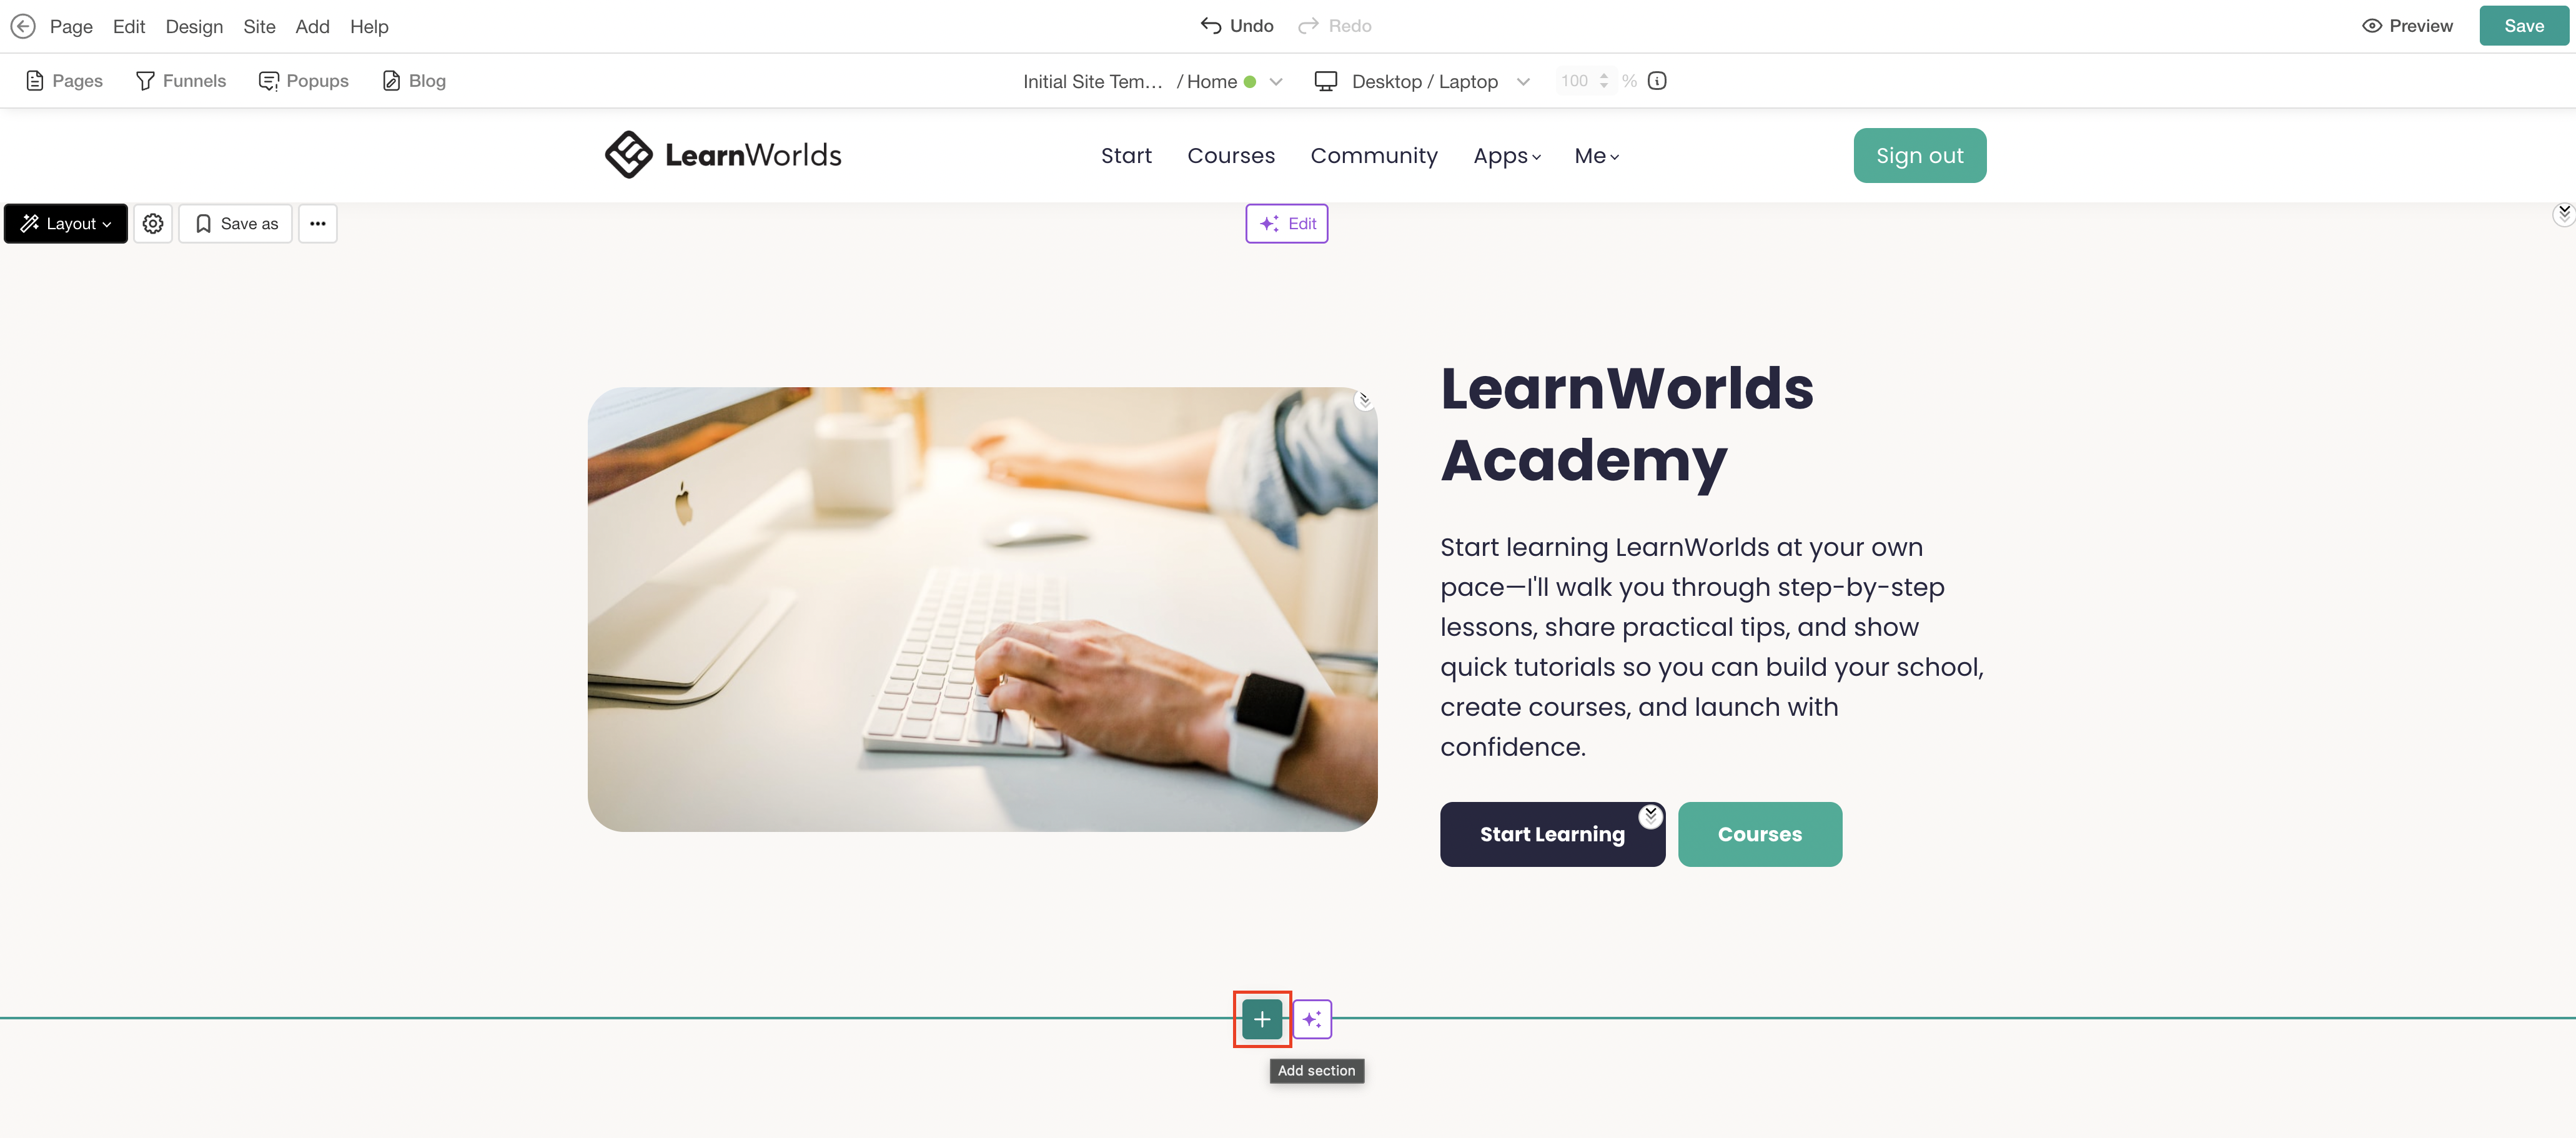
4. Select Course Catalogue under the Courses category. Select Add to insert the preferred section, or choose Fill with AI. When using Fill with AI, a dialog box will appear, allowing you to provide instructions to further customize the selected section.
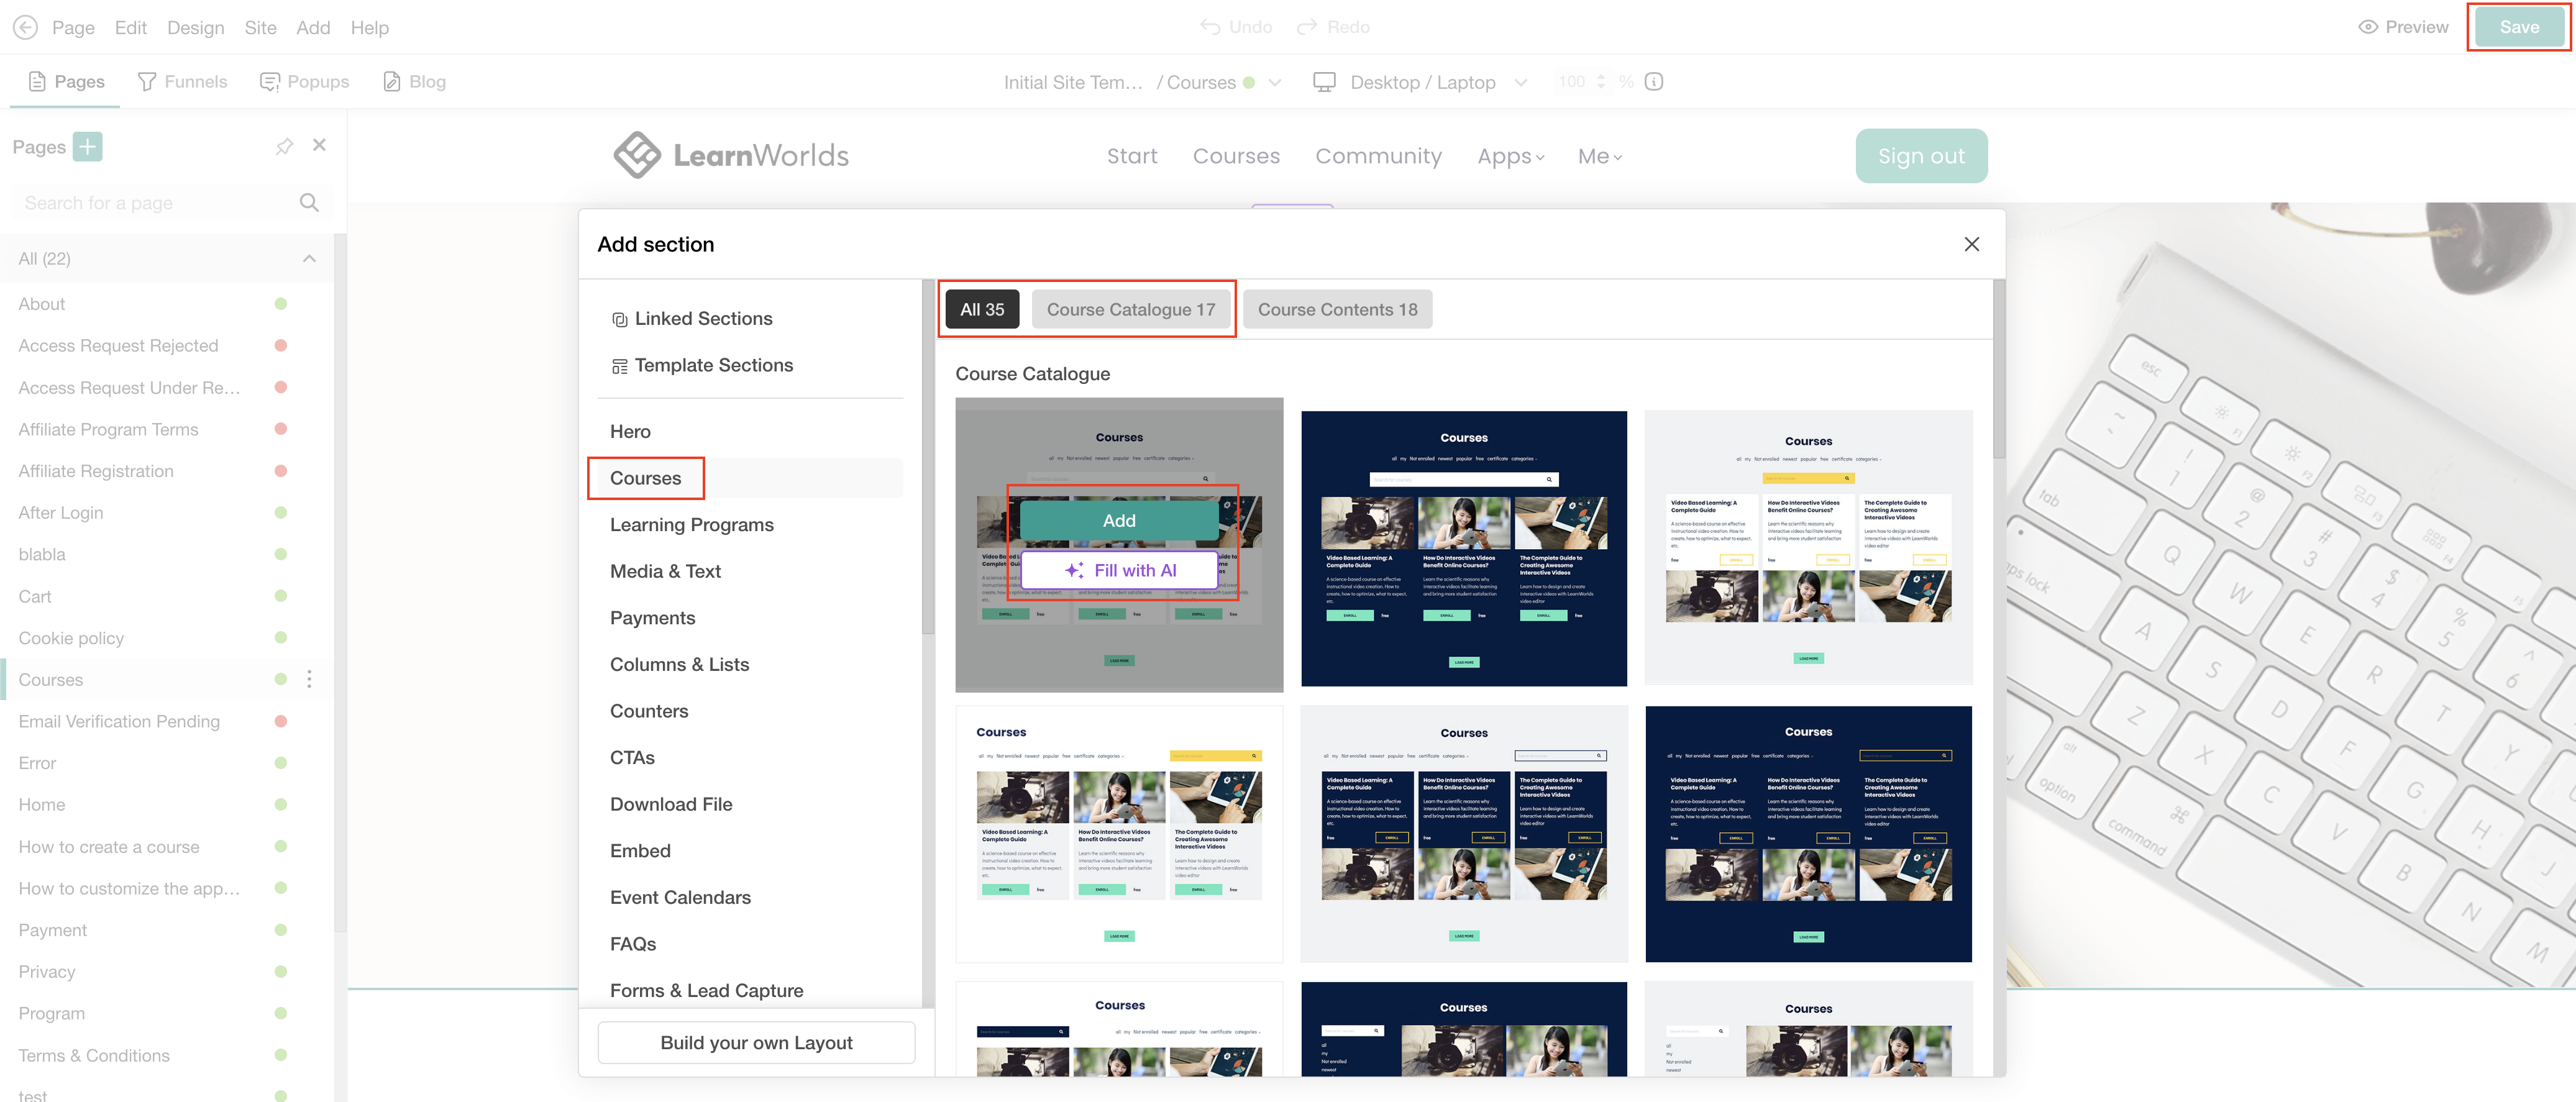
5. Click Save to save changes on the page.
 The Course Catalogue templates do not display Private or Draft courses, as these course types remain unlisted/unpublished. Private courses are visible only to users who are enrolled in them.
Customize course cards
To edit the section, hover over it and click Edit cards or click on the AI Edit option for the dialogue box to appear. The right-hand panel will open with all available customization options for the Course Catalogue section.
Catalog configuration
Choose which courses appear in the catalogue:
- All – Display all available public courses.
- My courses – Show only the courses the logged-in user is enrolled in.
- Custom list – Select specific courses manually to display.
You can also configure the Initial catalog view, which determines what users see first when they access the catalogue section.
Course card layout
Under Course card, you can choose the card style and layout for the catalogue section. 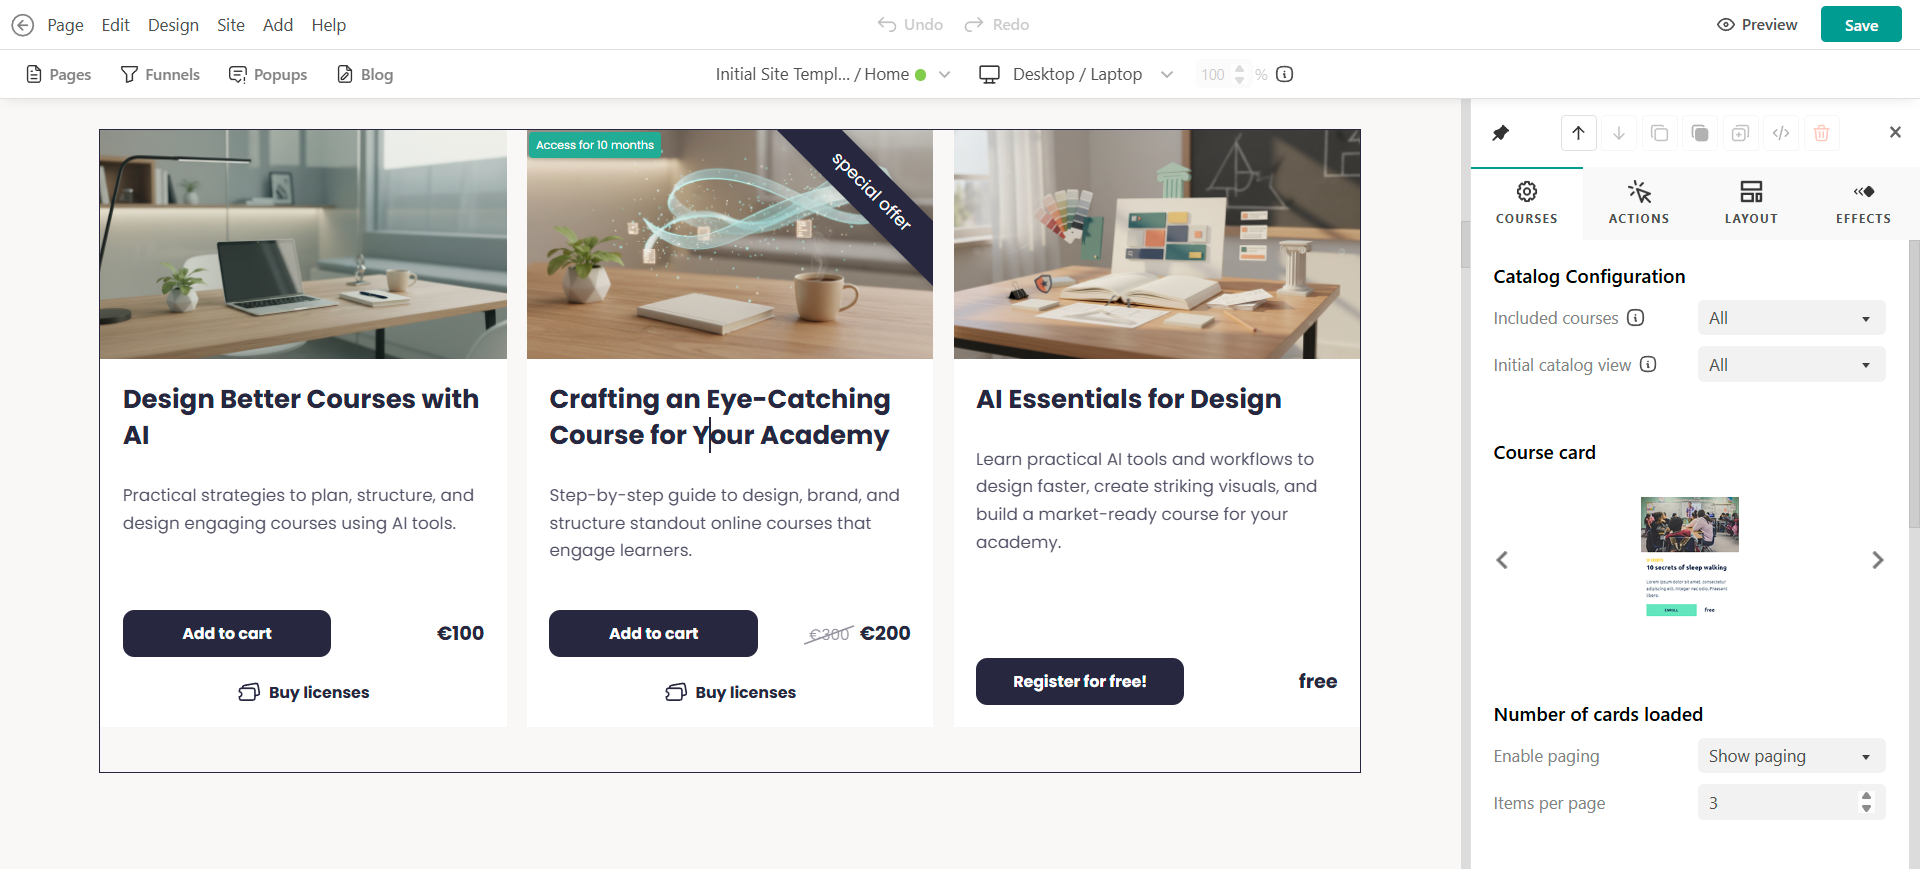
You can also control how many course cards appear in the catalogue section. Available options include:
- Enable or disable pagination
- Set the number of cards displayed per page
Card behavior: When clicked
You can choose separate actions for enrolled and non-enrolled users when they click on a course card.
Based on their enrollment status (not enrolled/ enrolled), decide whether they will see the course overview, course player, or the checkout, when they click on the course card.
You can also define whether the destination opens in:
- The same window
- A new window
For example, non-enrolled users can be redirected to checkout while enrolled users can go directly to the course player.If you redirect users to checkout, you can also automatically apply a coupon code.
- Create a coupon valid for your courses.
- Set the action to Go to checkout.
- Select the coupon under select coupon.
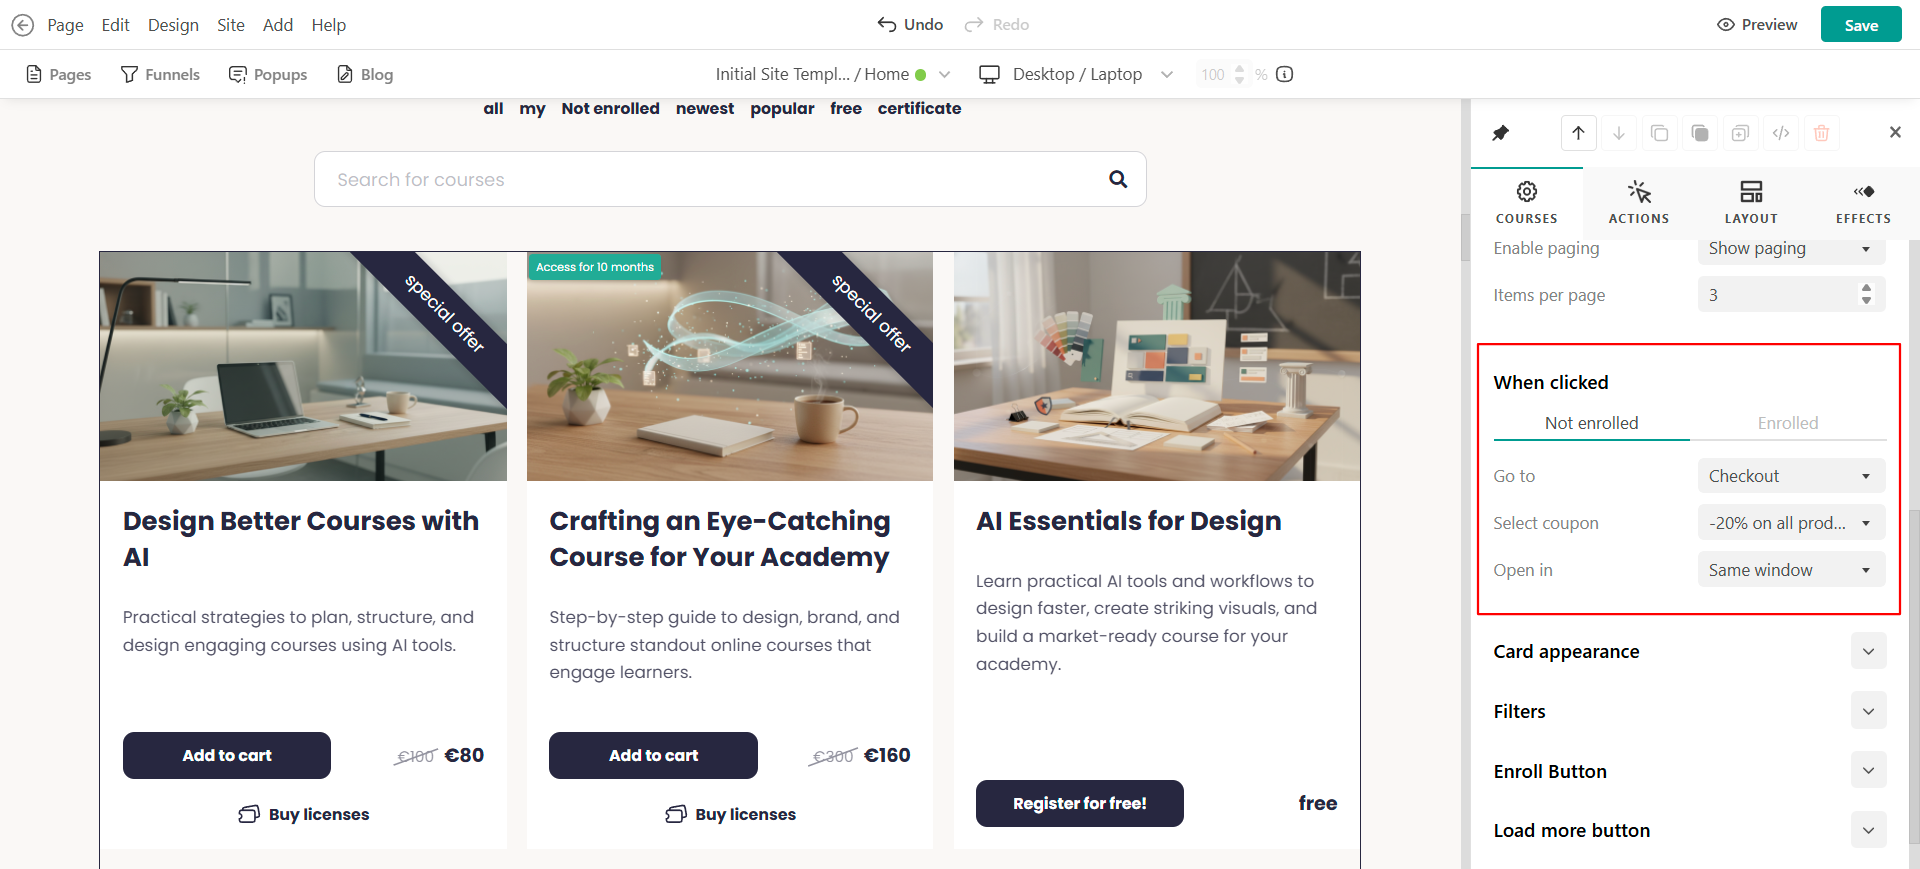
The coupon will automatically apply during checkout. This helps optimize both page design and browsing experience for learners.
Card appearance
Under Card appearance, you can customize the visual styling of the course cards.Options may include:
- Showing or hiding pricing
- Displaying progress bars
- Optimizing image
- Whether to display a ribbon (like “Best Seller” or discounts)
- Ribbon position (e.g., top right)
These settings help align the catalogue design with your school branding.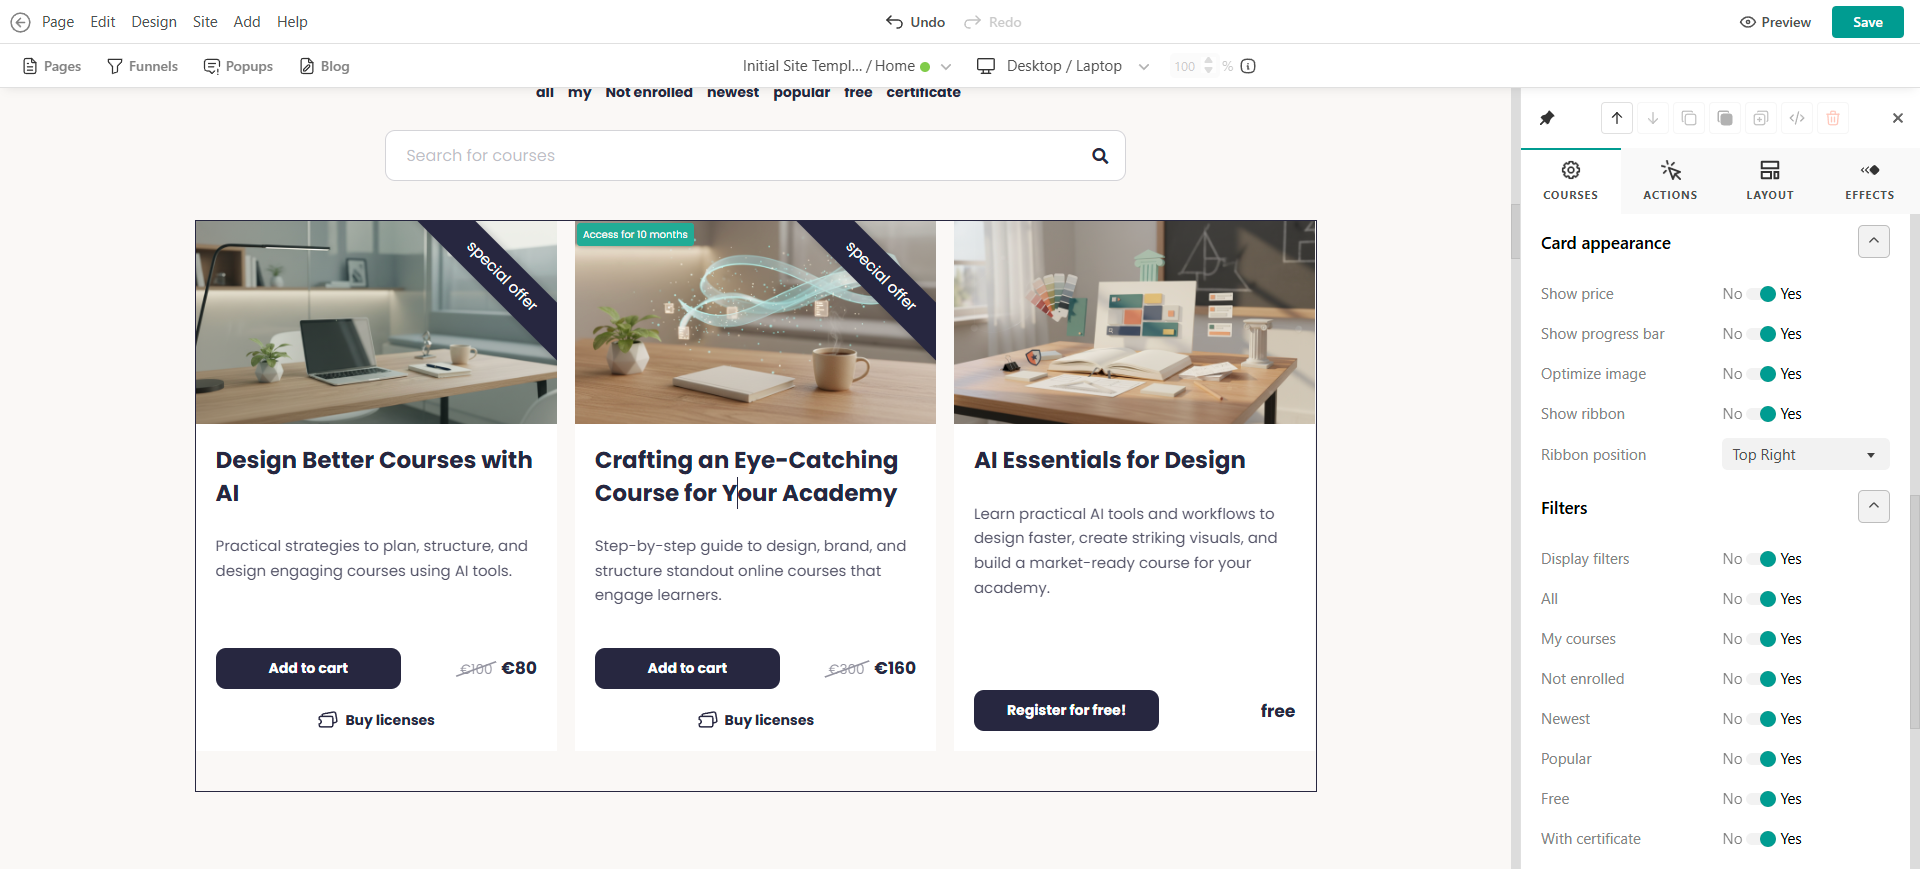
Filters
Enable filters above the catalogue section to help users quickly browse courses. Available filtering options may include:
- My courses
- Not enrolled
- Newest
- Popular
- Free
- With certificate
Filters improve navigation for schools with larger course libraries.Enroll Button
The Course Catalogue section includes customizable enrollment buttons designed to guide users toward enrollment or course continuation. You can customize button type, size, color and behavior (button click). With button click option you can either direct users straight to the payment page (automatic) or follow the action set in the course card’s “When clicked” setting.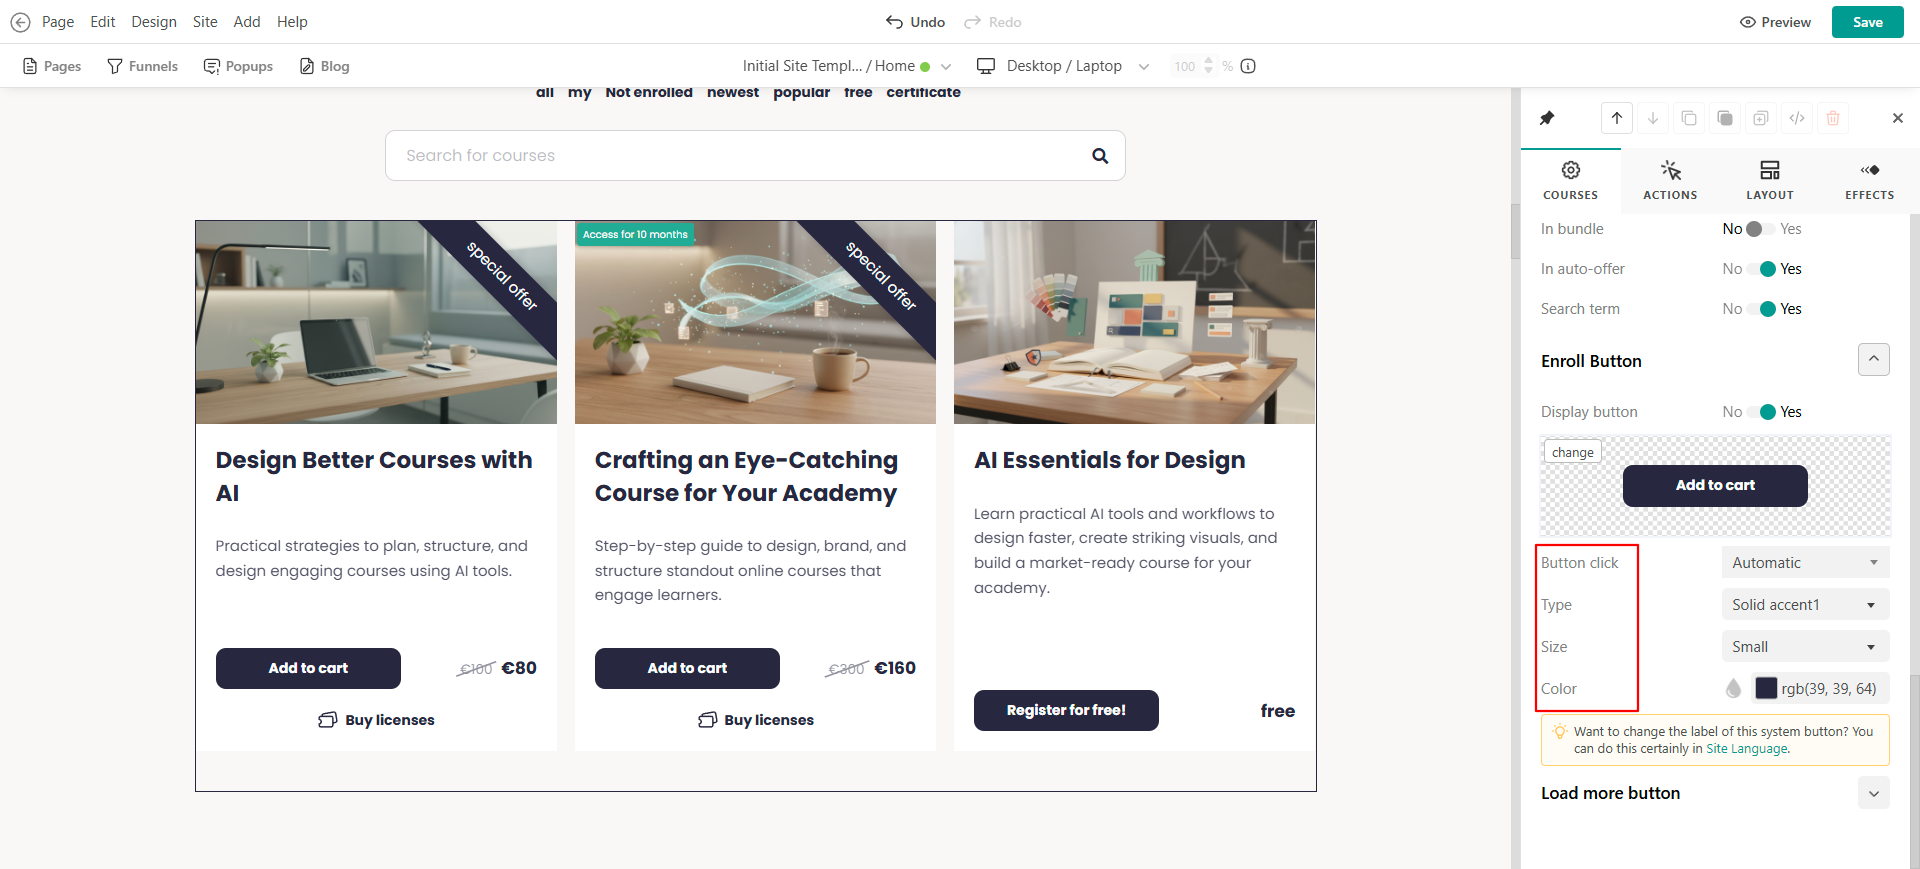
Once a learner is enrolled, the button label automatically changes from Enroll or Add to cart to Continue, allowing users to resume learning directly.
Load more button
Customize the appearance and behavior of the Load more button displayed below the catalogue section. You can control button's type, size and color.
This button allows users to load additional course cards without navigating away from the page.
- When configuring settings, changes appear live in editing mode so you can preview the final look. This is a user-based experience, meaning that as an admin, what you see depends on your account and course access. To test the final user experience, create a test user account.
- To change the order of your courses in the Course Cards, click here.
- Check how to customize the Course Cards content and elements (course image, title etc) here. Course Cards content is interactive and automatically adjusts based on changes made in the course settings.
- If you are using licenses or gifts, the corresponding buttons will appear under to your enrollment buttons.
- The My Courses option in the Catalogue Configuration shows the courses a student is enrolled in. The order is determined for each user based on the last visited course.
- Users can search based on course titles and course descriptions in the search bar.