
The Hello Bar is a global website component that appears above your website's Topbar. It helps you highlight important information such as announcements, promotions, course updates, or any other message you want visitors to see across your entire website.
In this article, we'll learn how to create, customize, and manage the Hello Bar.
Use cases
Some common ways to use the Hello Bar include:
- Announce a new course launch.
- Promote a limited-time offer or discount.
- Share important platform or maintenance updates.
- Inform learners about upcoming webinars or events.
- Highlight seasonal campaigns or special announcements.
Create a Hello Bar
From your Admin Dashboard,
1. Go to Website → Design → Edit Website.
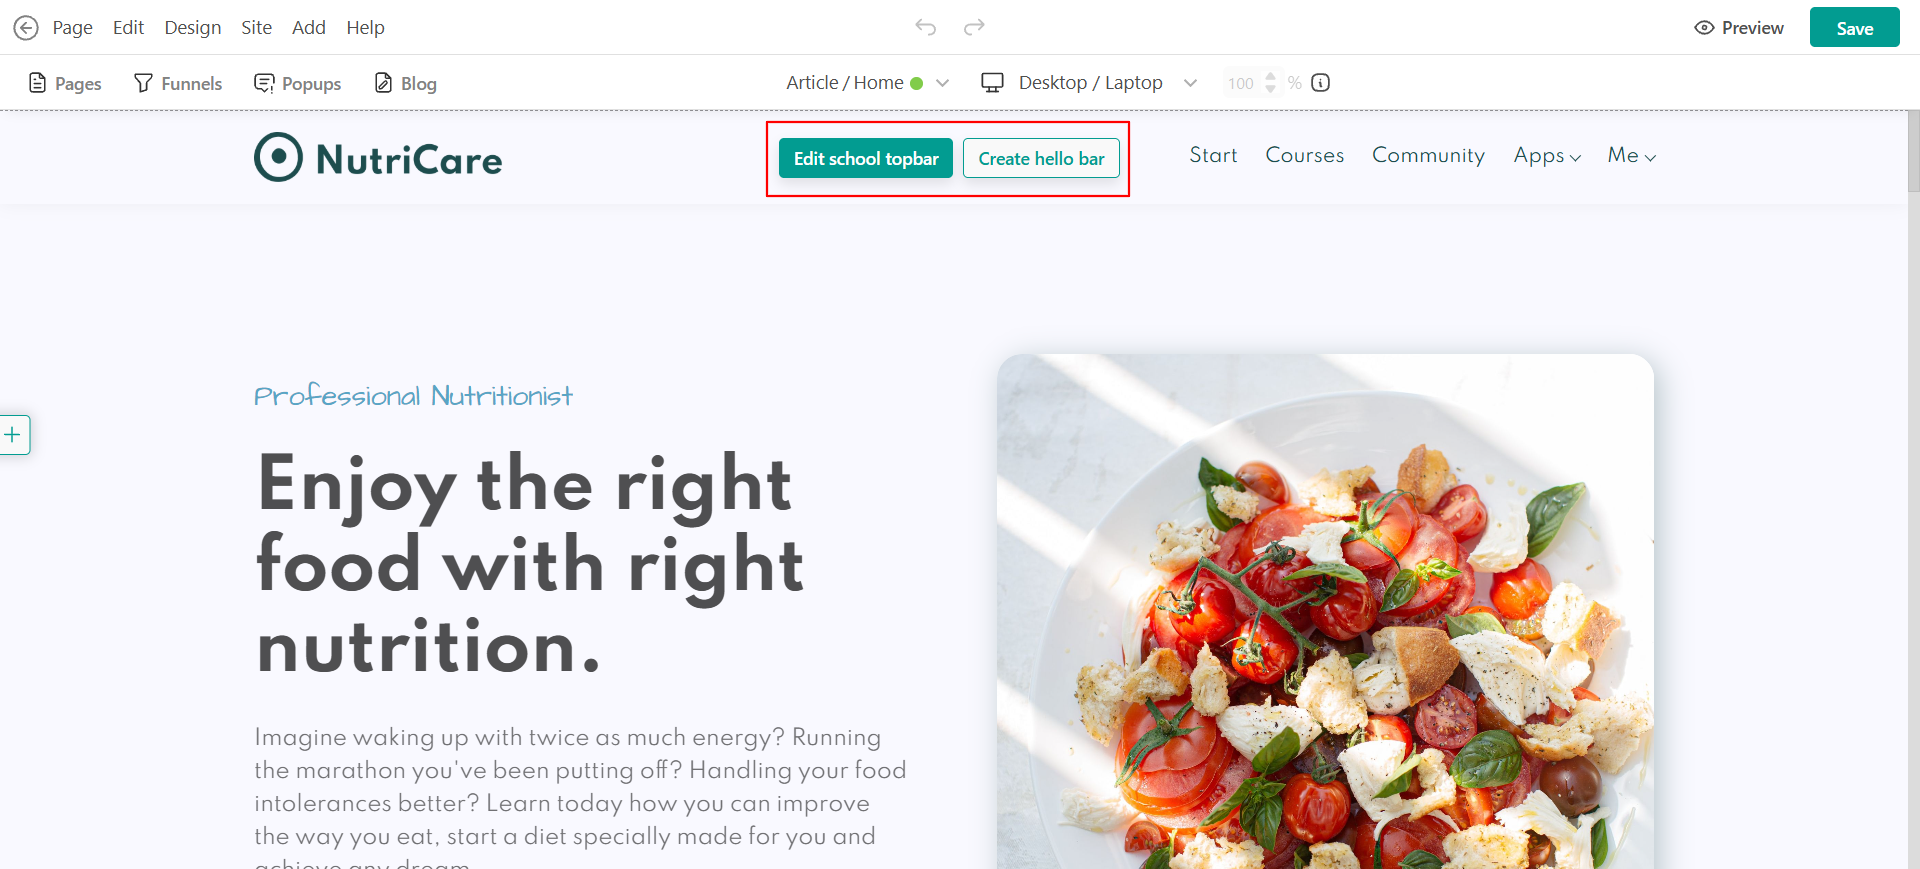
2. Hover over your website's Topbar.
3. Click Create hello bar.
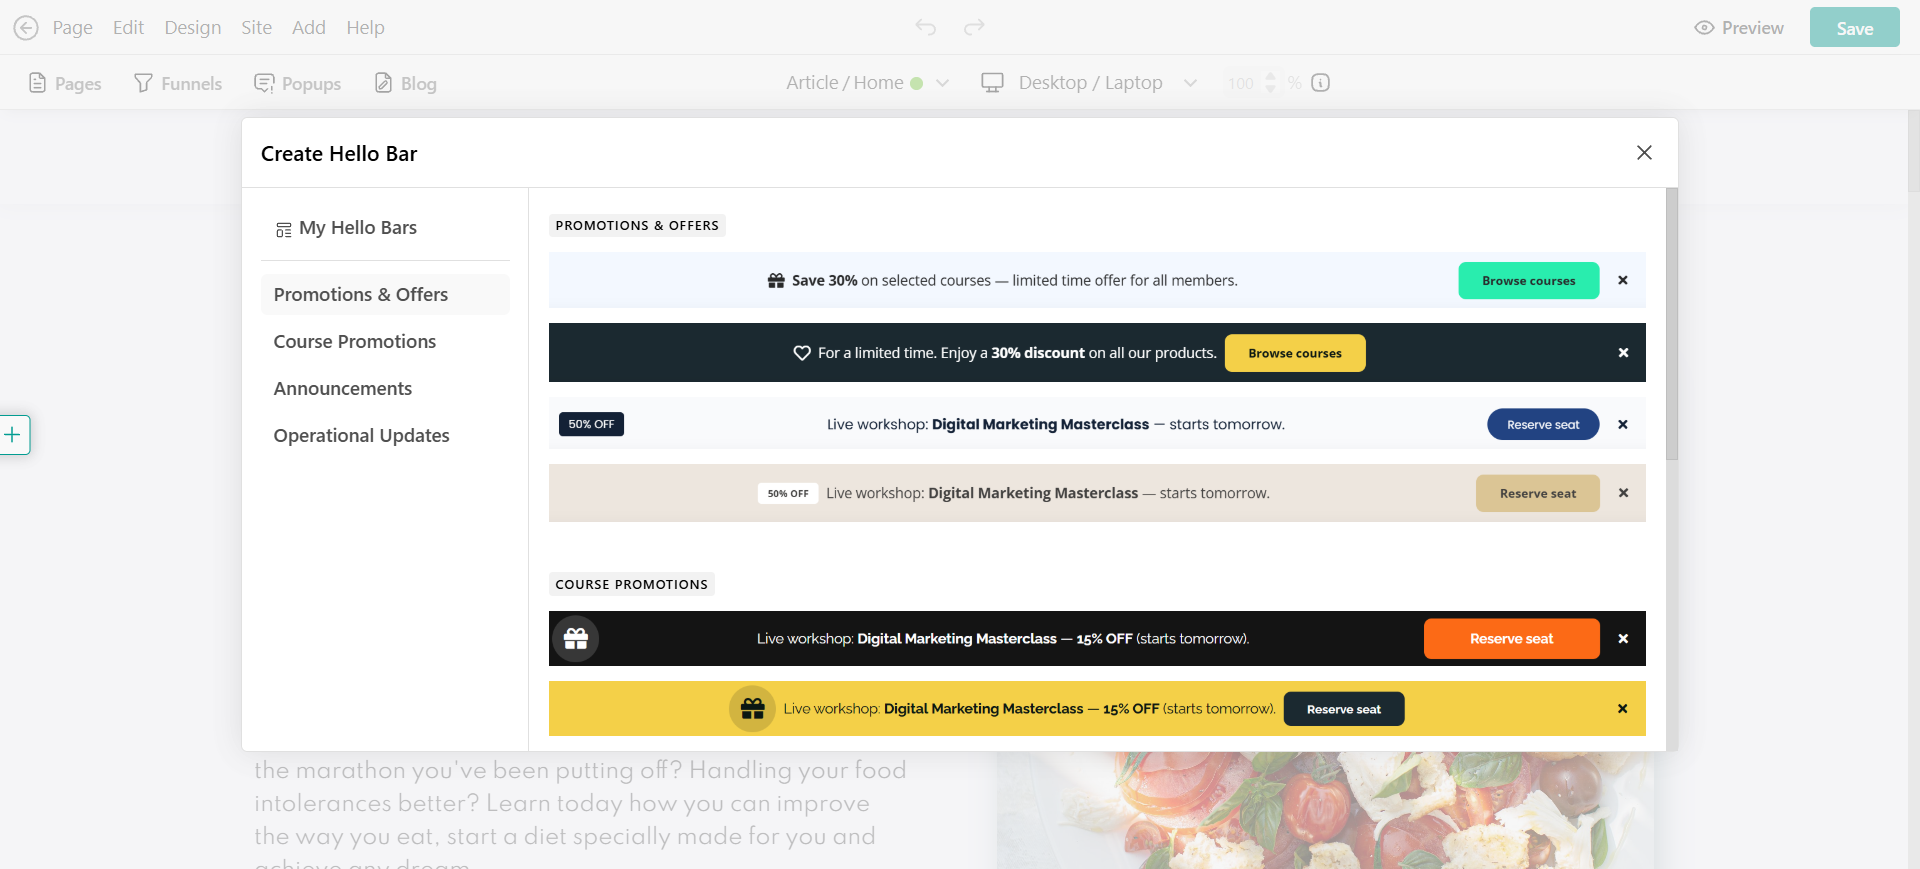
4. A list of the available templates will appear, select one of the available Hello Bar categories and click add.
- Promotions & Offers
- Course Promotions
- Announcements
- Operational Updates
5. A default Hello Bar is added above the topbar and opens in editing mode.

- You can also navigate to the Page → Hello Bar settings to enable or disable the Hello Bar.
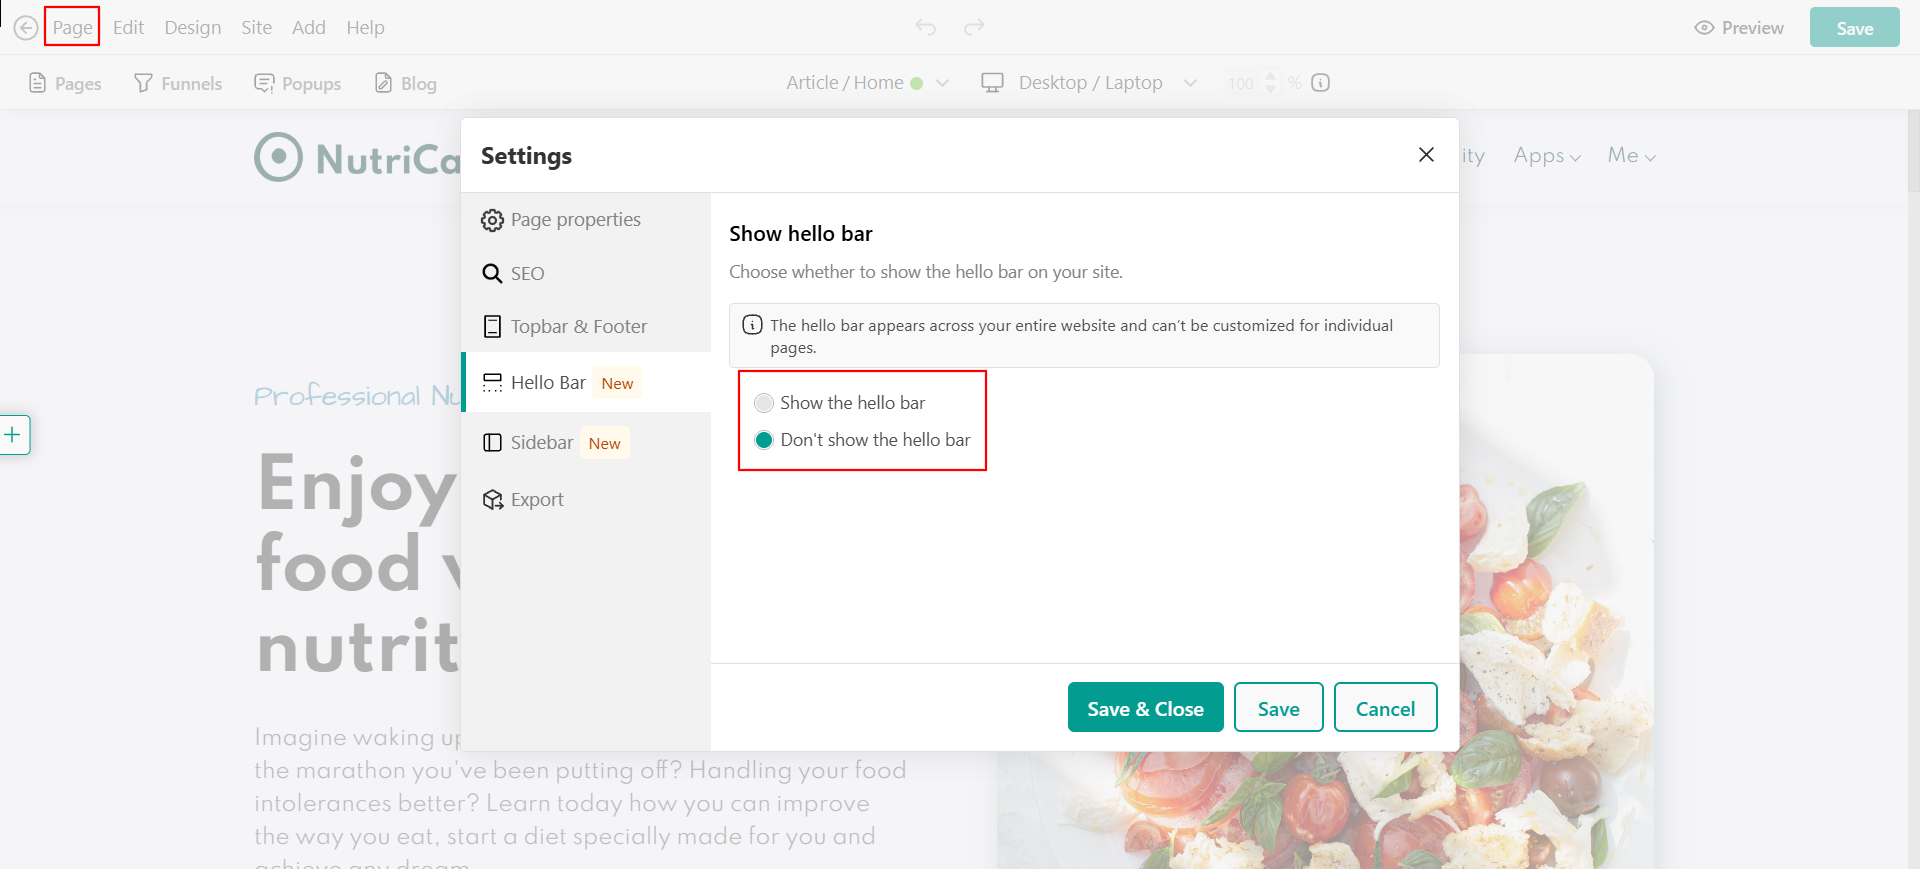
- Only one Hello Bar can be active at a time.
- The Hello Bar is a global component, meaning the same content appears across your entire website and cannot be configured separately for individual pages.
- Any changes you make are applied site-wide.
Customize the Hello bar
After creating your Hello Bar, you can modify its design and content.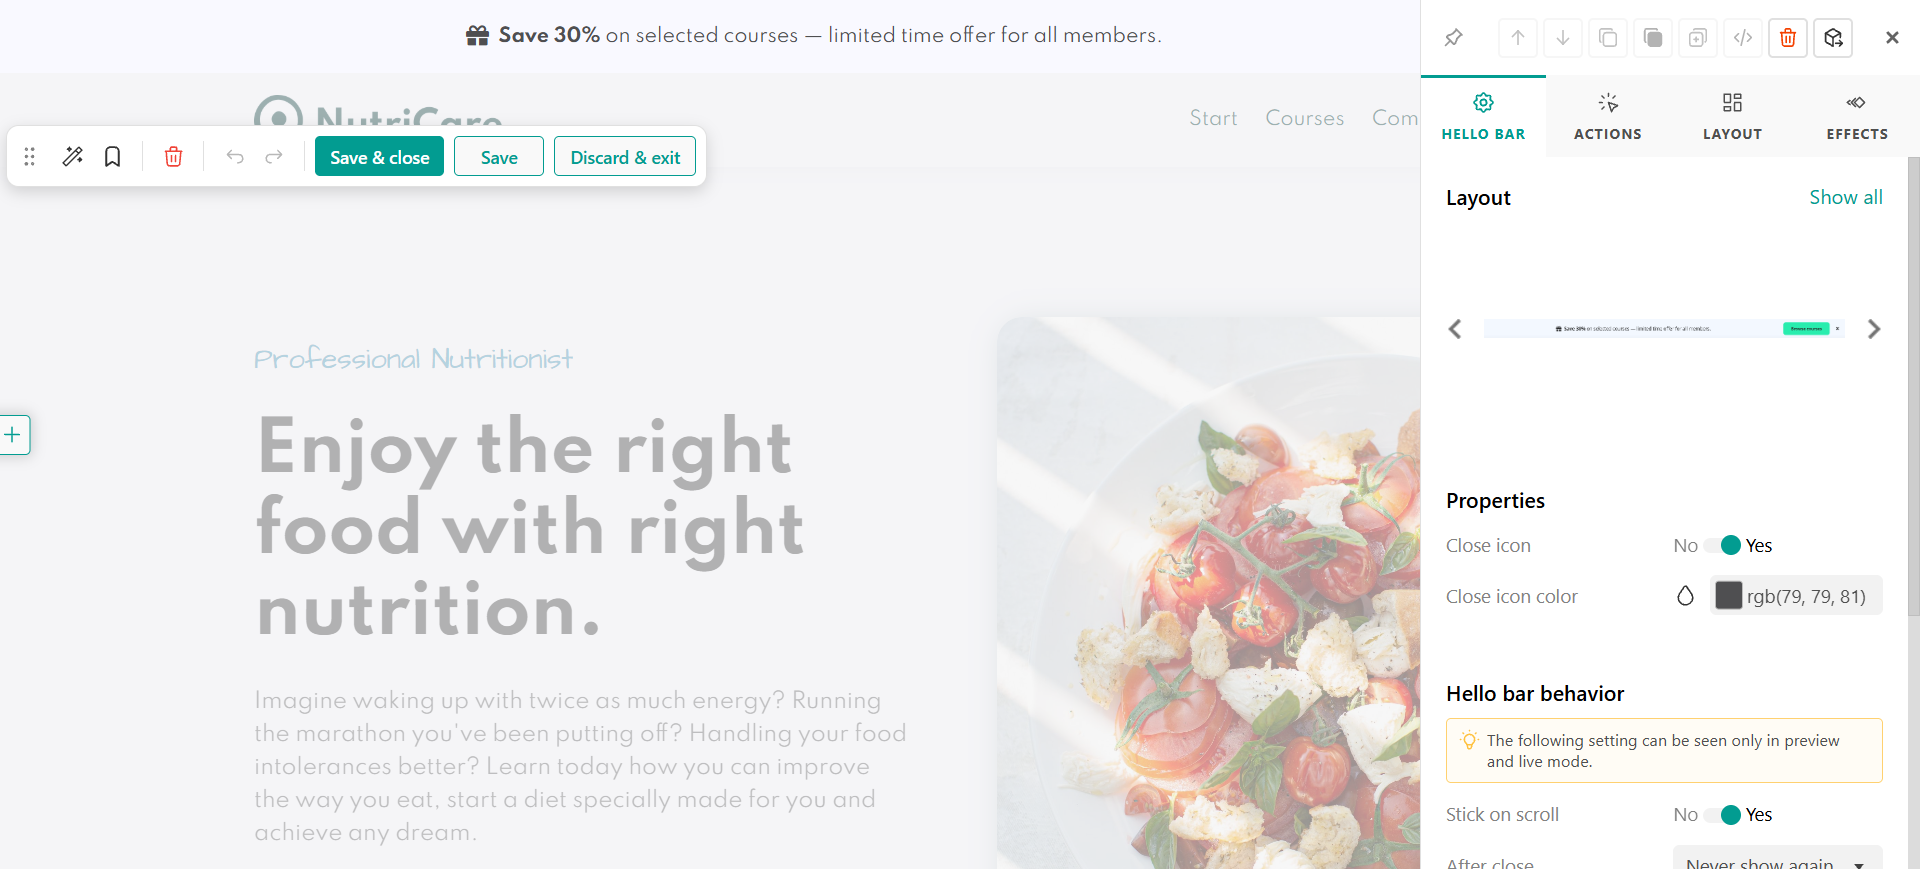 Use the editor to customize it. You can:
- Change the template or layout.
- Save the current layout as a template. After customizing the Hello Bar, you can save its layout as a template. The template will be added to your list of available layouts, allowing you to reuse it whenever you need.
- Edit text, buttons, and other content.
- Add or remove widgets.
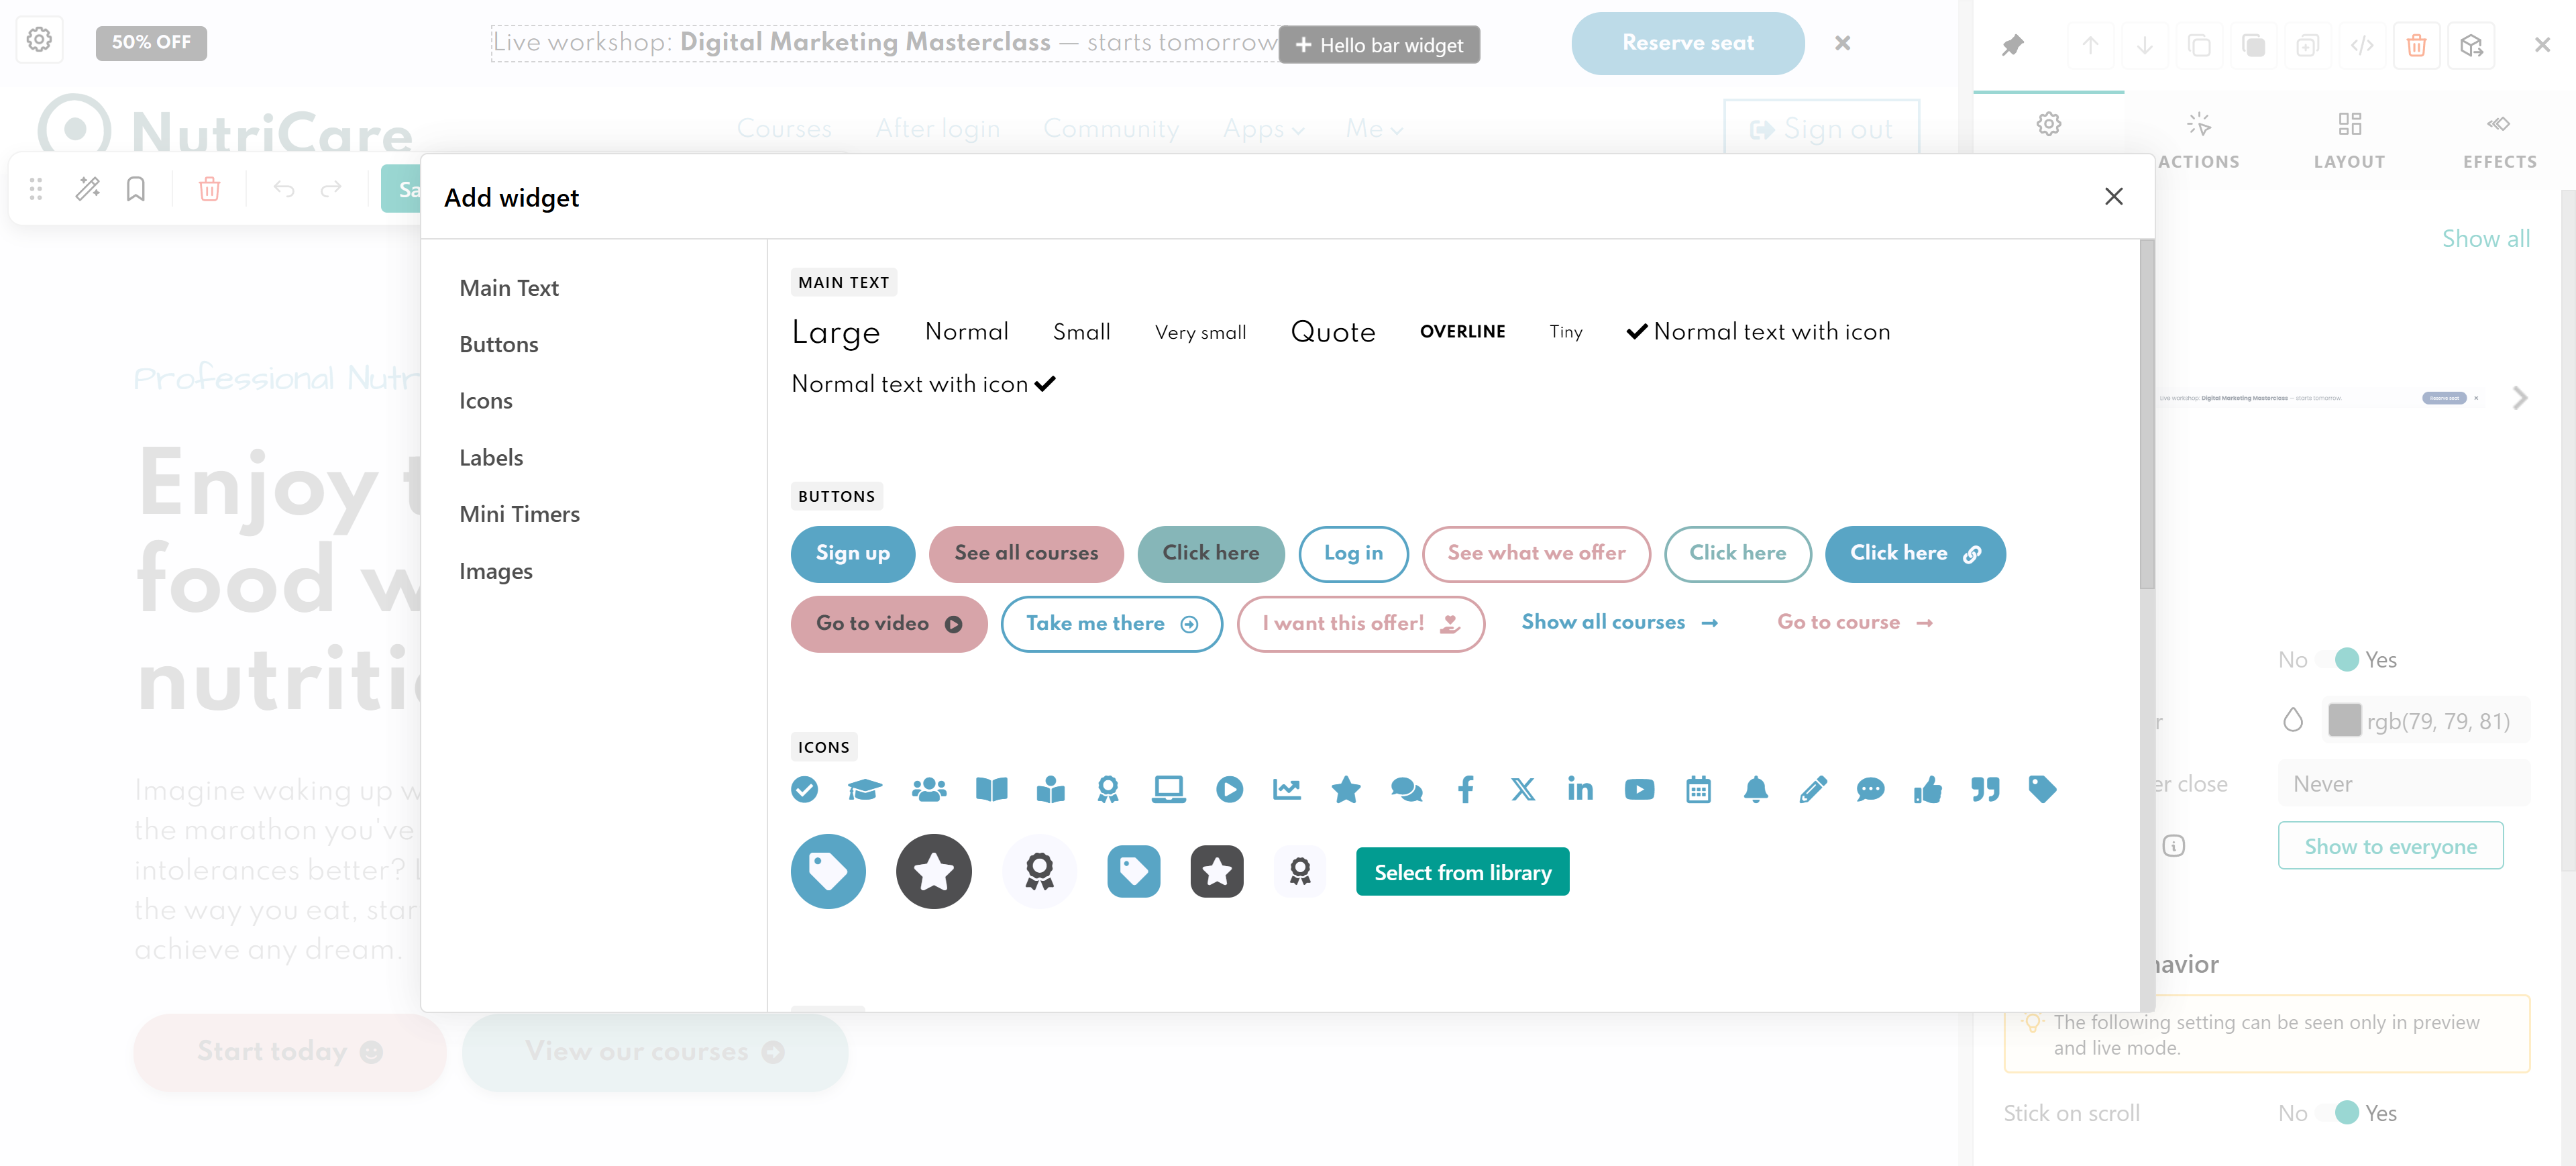
- Delete the Hello Bar.
Configure Hello Bar behavior
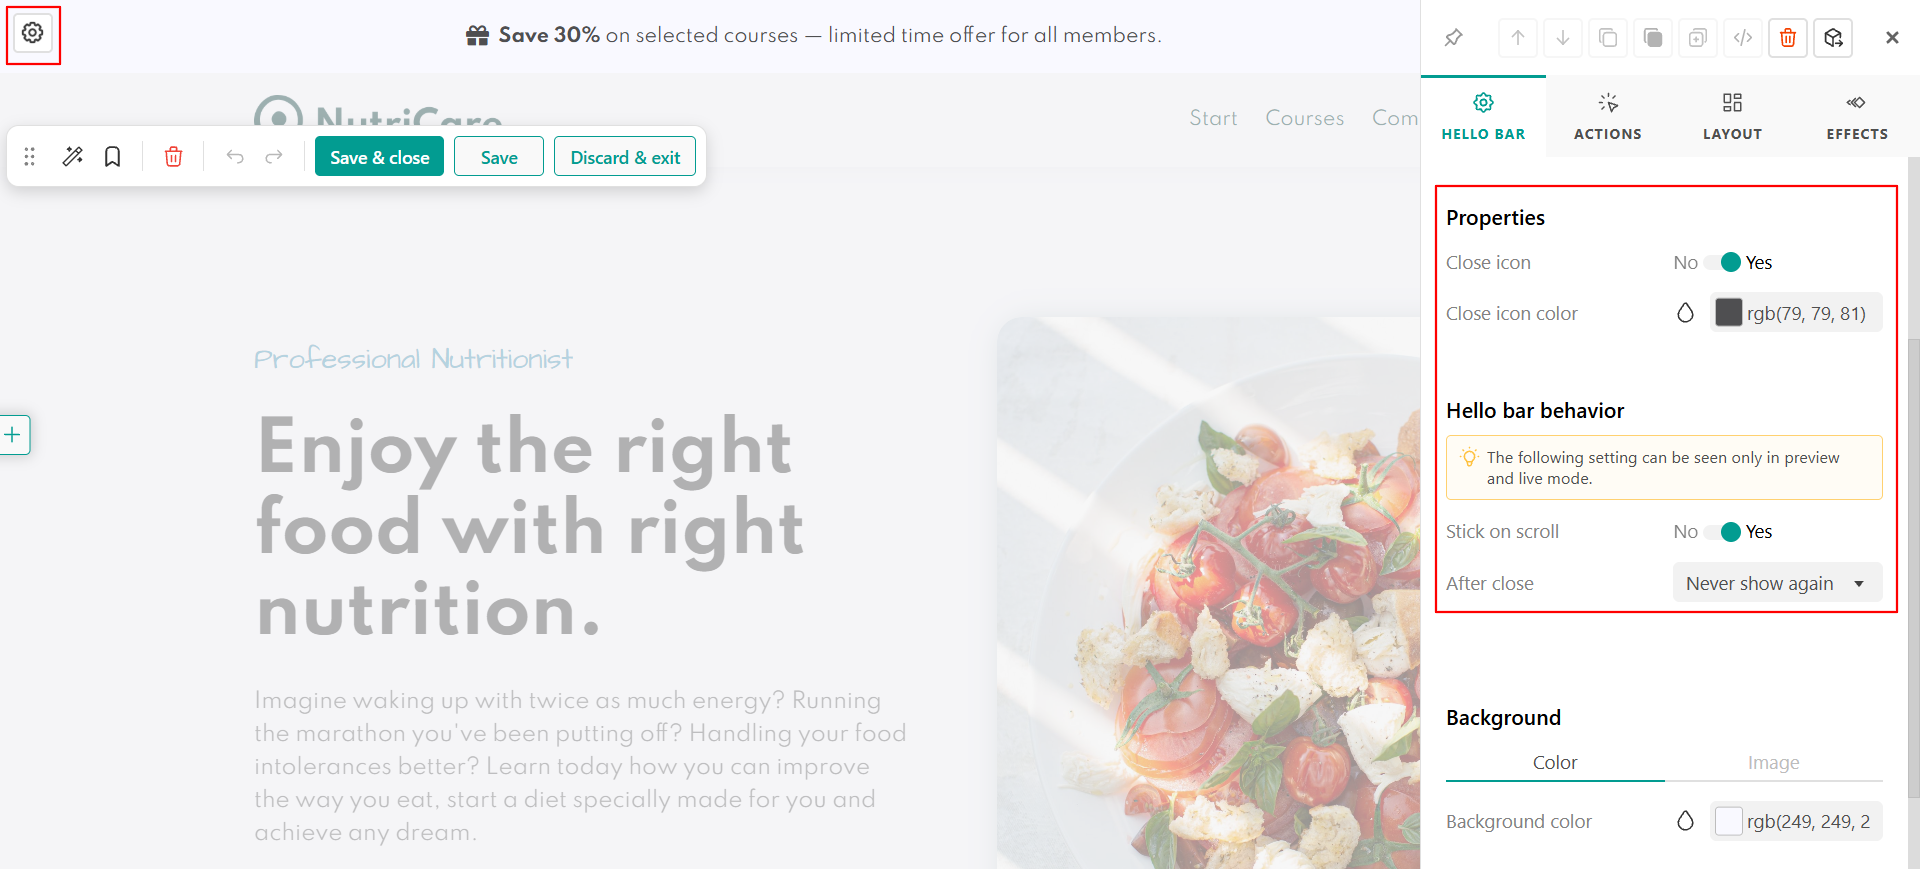
The Hello Bar includes several settings that control how it appears and behaves. From your right sideform you can:
- Include or not a close icon and change its color.
- Decide if you will show the close icon again after closing (never, on next visit, after some days)
- Reset visibility. Use this option to make the Hello Bar visible to everyone again. Even if visitors have previously dismissed the Hello Bar, resetting its visibility will display it to all users the next time they visit the page.
- Stick on scroll keeps the Hello Bar fixed at the top of the page while visitors scroll. You can preview this behaviour using the website preview.
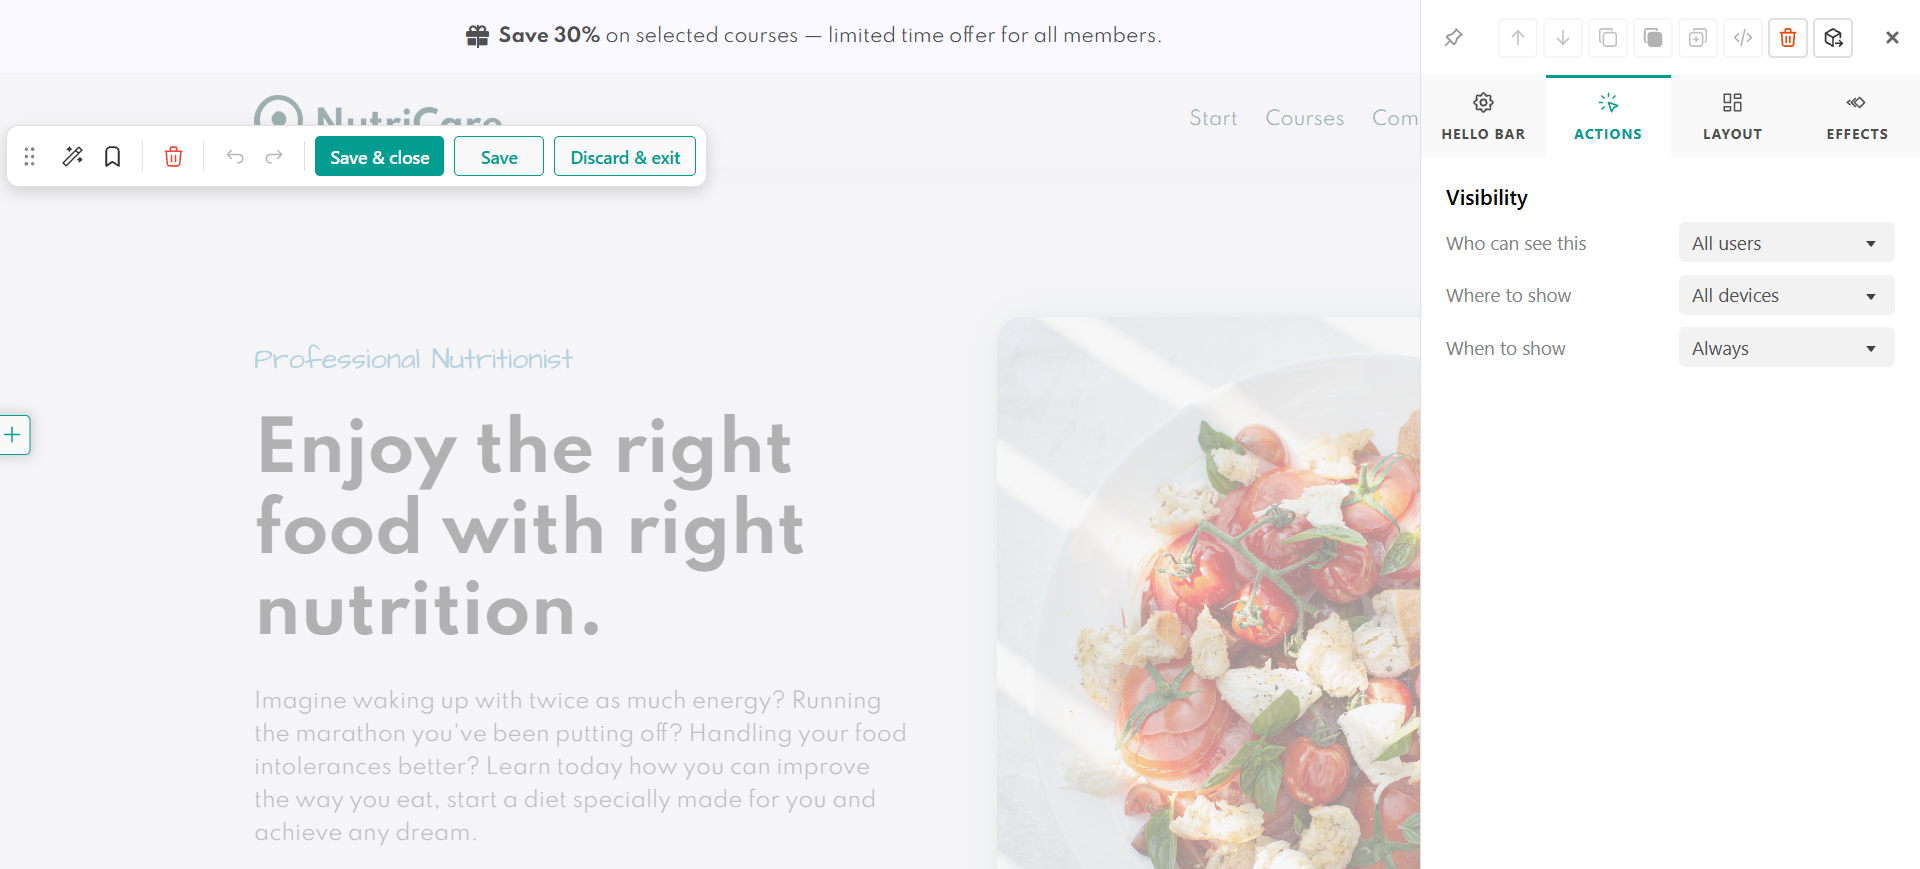
 Under Actions, you can configure when and where the Hello Bar appears. You can:
- Choose who can see it (all users, logged-in users, logged-out users, tagged users, or nobody)
- Select which devices display it
- Set a time frame so the Hello Bar appears only during a specific period
When you're finished editing click Save to keep your changes.
- Keep your message short and easy to read.
- Use the Set time frame option for temporary announcements, promotions, or events.
- Preview your Hello Bar on both desktop and mobile before publishing.
- Use the visibility settings to display announcements only to the intended audience.
- Enable Stick on scroll if the message should remain visible while visitors browse your website.