A Learning Program allows you to group multiple courses and offer them as a single product. It’s ideal for creating structured learning paths, packaging related courses into one offer, or simplifying the enrollment process for learners.
Instead of enrolling in each course individually, learners can access all content in one place, often at a bundled price.
This setup is especially useful for:
Schools and businesses delivering organized training tracks.
Educators and creators packaging themed course bundles.
Teams and organizations monitoring progress across multiple courses.
Learning program wizard
To get started:
1. Go to the Courses & Programs tab and click Programs/ Subscriptions.
2. Click the Create program/subscription button to open the setup wizard.
The wizard will guide you through several setup steps:
- Choose between a Learning Path or a Learning Collection; you can change the type later in the General Program settings.
Learning Path: A structured sequence of courses that guides learners step by step through a recommended curriculum.

Learning Collection: A flexible library of courses that allows learners to explore content at their own pace.

- Name your Learning Program. Optionally, you can add a description and a cover image.

- Set the Program’s URL by adding your preferred course ID at the end of the URL.

 The original ID of your Learning Program cannot be changed once the product is created. While you can customize the program’s URL on the Access Page, the underlying ID will remain the same. You can find more details here.
 - Set the Program's access, which can be set as Draft, Public, or Private.

- Select the payment option; you can set it as free, choose a one-off payment, or a subscription-based payment.
 Stripe must be enabled for the subscription option to be available.
 - When selecting a subscription learning program, choose whether it will be tiered or simple.
- Add a price. You can also enable the Include compare-at-price to show savings option.

- Choose the default theme layout for your learning program page or apply a layout from another program.

- Click on Finish, and your program is ready.
You can find more information about how to manage your learning programs here.
Program courses
Once the Learning Program is created, hover over it and click Edit Program from the three-dot menu.
You’ll be taken to the Program Courses tab, where you can see all the courses included in the program. From this page, you can:
- Add more courses by clicking the Add Course button.
 Draft courses can’t be added to learning programs. Please update their status before adding them.
 - Reorder the courses. This is especially relevant for Learning Paths, where the sequence of courses matters for the learning flow.
- Preview the program layout page or program player.
- Insert a course below a specific one already in the list.
- Edit a course. This option will redirect you to the course settings page.
- Enable drip feed for your courses.
- Remove a course.

-When a user purchases a learning program that includes multiple courses, they are free to complete the courses in any order; there is no enforced sequence.-By default, if the user begins their journey using the automatic navigation button, they will start with the first course listed in the Program Courses tab.
Learning paths vs. Learning collections
When creating Learning programs, you can structure them as either learning paths or learning collections. Let’s take a look at the differences between the two
Learning Path: A Learning Program with Paths is a structured, guided learning experience where learners follow a predefined sequence of steps. Each path acts like a progression track, allowing you to break a program into stages or milestones.
Learning Collection: A Learning Program with Collections groups multiple learning items together without enforcing a specific sequence. Each collection is essentially a themed or categorized set of courses and materials.

Below, you can find a table that compares the two views.
| Feature | Learning Path | Learning Collection |
|---|---|---|
| Use case | A structured, goal-oriented program. Example: “Your path to becoming a Front-End Engineer for $500” | A flexible access model for themed course bundles. Example: “Get access to all our ‘Sketch with Pencil’ courses for $10/month” |
| Course display format | Courses are arranged in a sequence, similar to units within a single course. Learners follow a suggested order. | Courses are listed in a library or catalog. Learners choose freely among them. |
| Course navigation (in player banner) | Learners can jump to the next course in the path. | No automatic navigation between courses. Each is treated as a standalone. |
| Previous button (first unit of a course) | Navigates to the previous course in the path. | Does not go to the previous course. |
| Next button (last unit of a course) | Navigates to the next course in the path. | Does not go to the next course. |
Program layout page
On this tab, you’ll find the Program Layout Page. Click Edit Layout Page to start customizing how the page appears.
You can find more information about this here.
Learning program settings
General
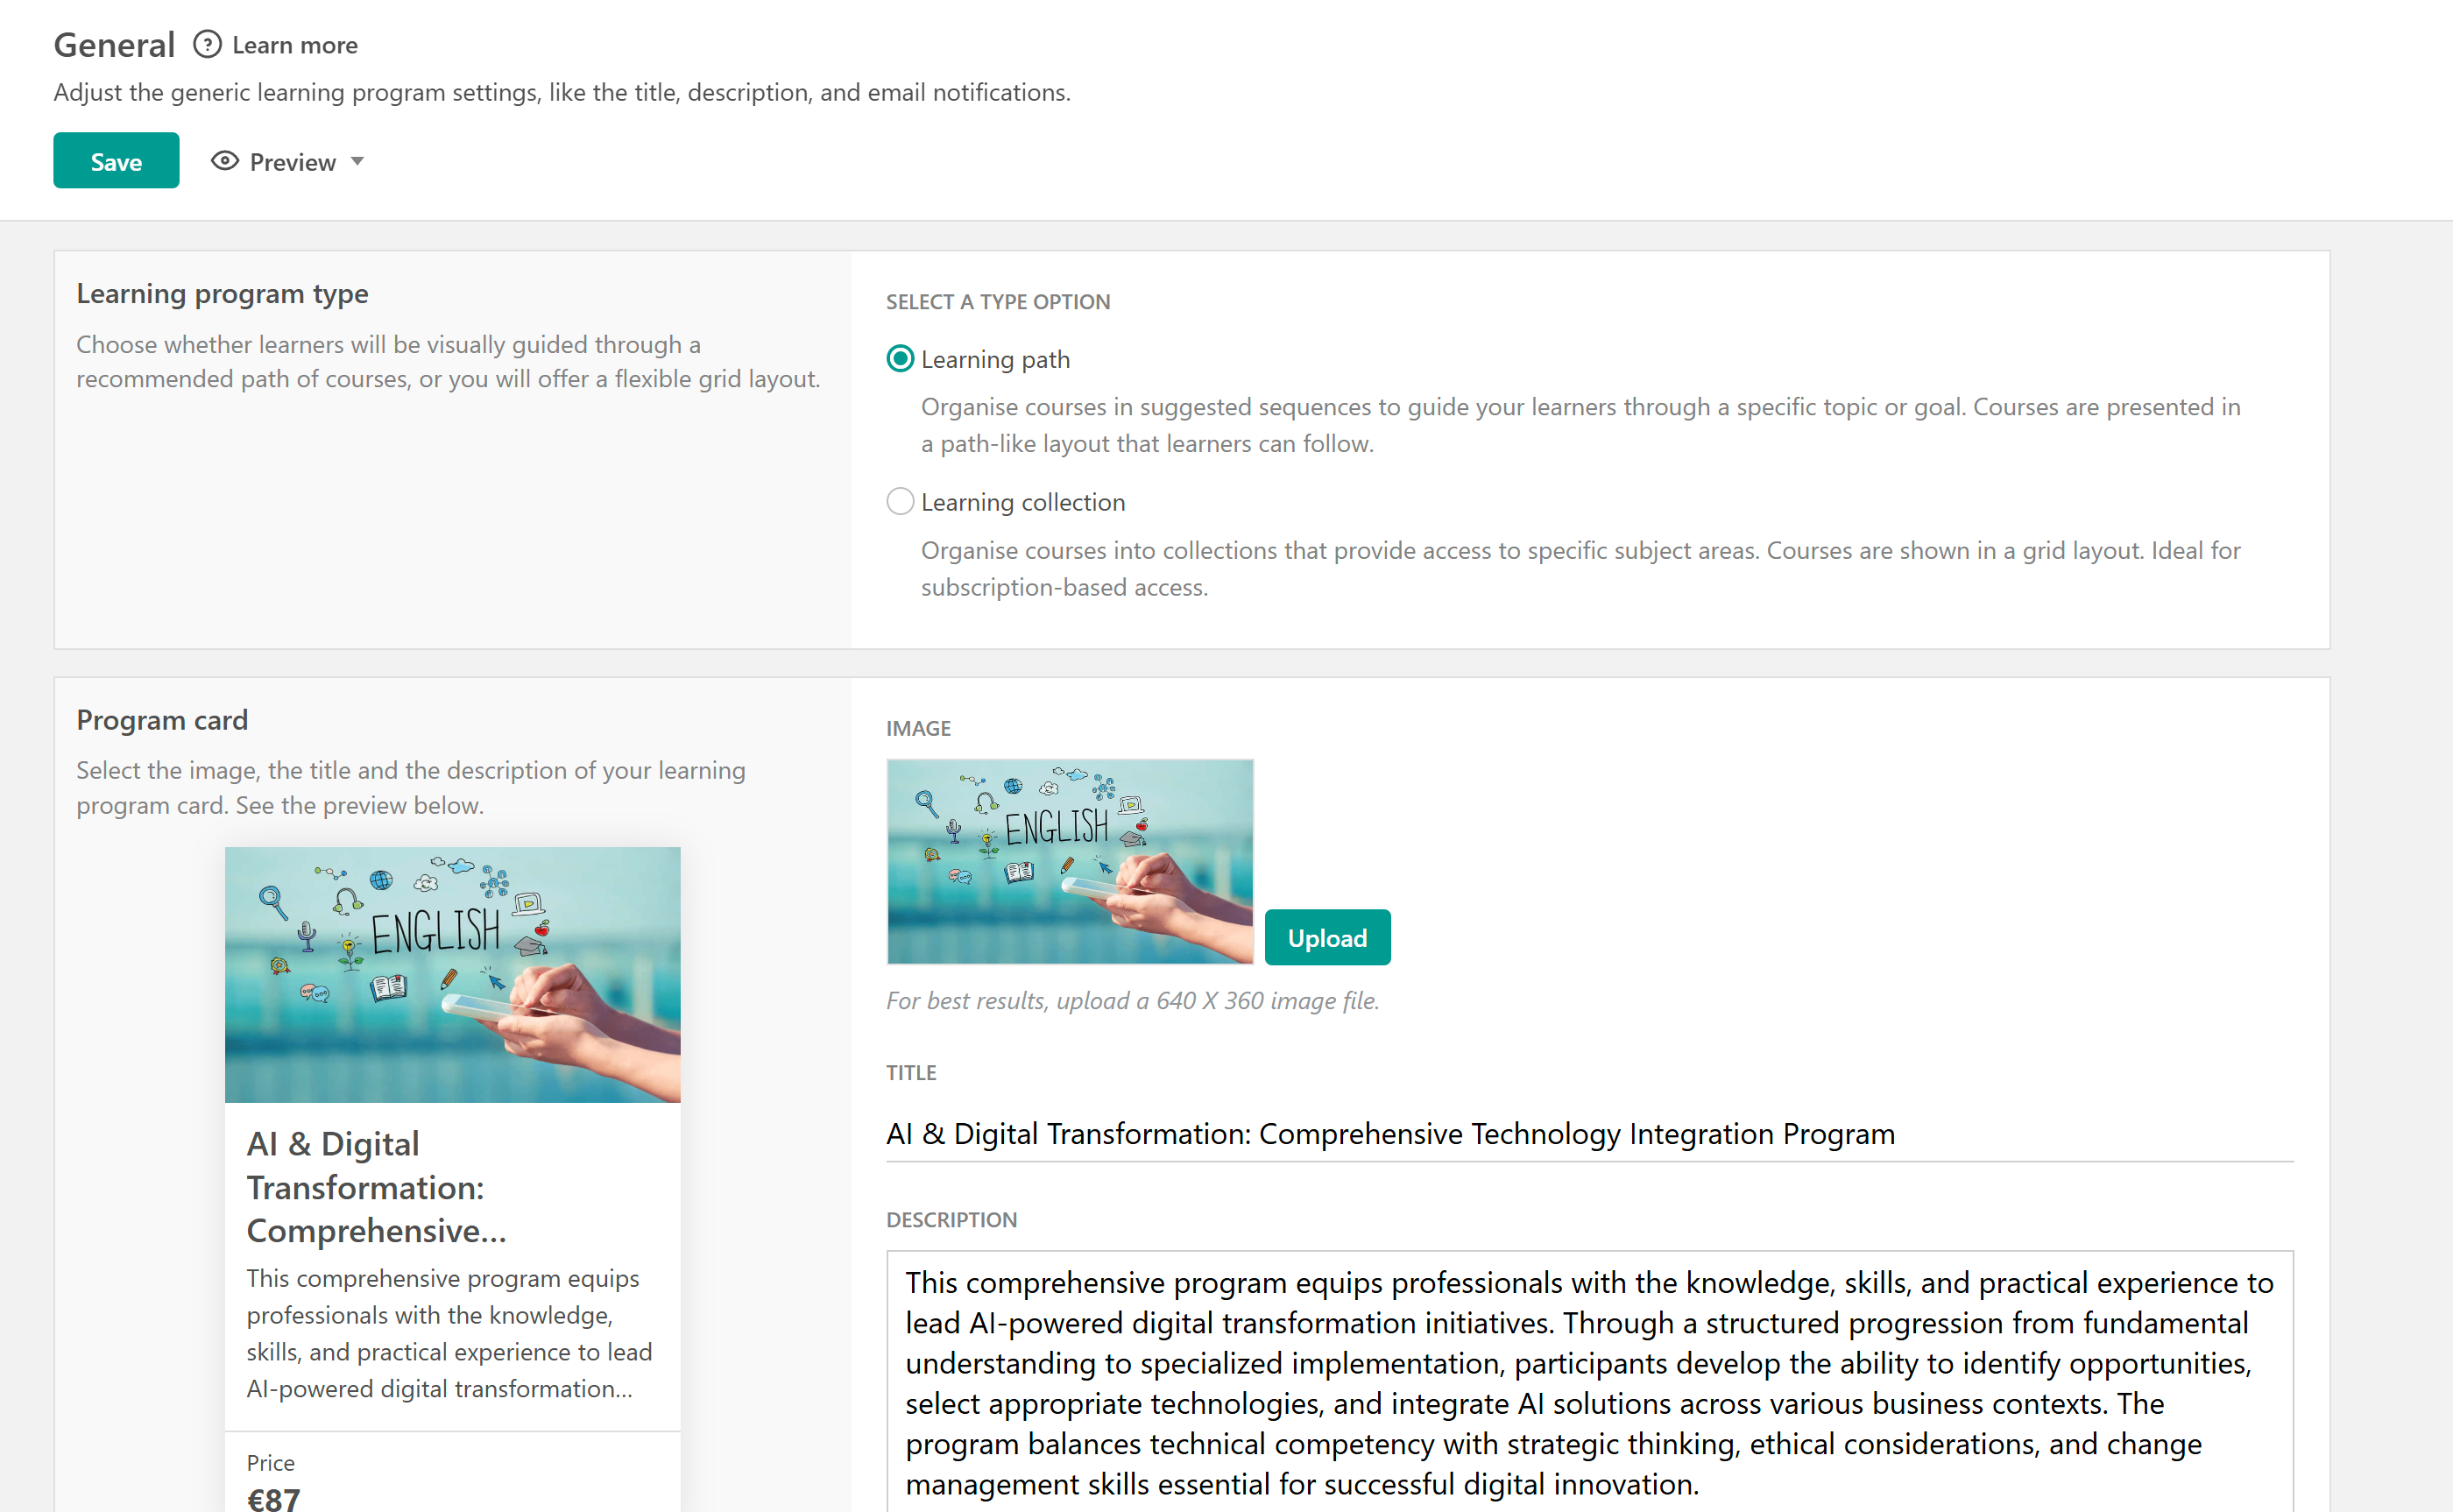
Under the General tab, you can customize the settings of your Learning Program. Specifically, you can:
Switch between Learning Path and Learning Collection types.
Upload or update the layout image.
Edit the program title and description.
Add relevant labels for better organization and filtering.
Configure email notification settings to control what learners receive upon enrollment. You can use the default school-wide emails or customize the notifications specifically for this program.
Set up SEO settings for your program—either extract them automatically or enter them manually for greater control.
Access
The Access tab allows you to:
- Change the program access (draft, public, private).
- View and copy the program’s URL. While the program's ID can't be modified, you can edit the public URL if you want. Find more information about this here.
- Copy the Product ID, Checkout link, and Add-to-cart URL.
- Set expiration date: You can set an expiration date, e.g., expire after 1 day/week/month/year.
- Choose your after-purchase navigation. You can use global navigation settings or set product-specific navigation.
Pricing
In the Pricing tab, you can configure how your Learning Program is offered and sold. Learning Programs can be provided for free or as paid offerings, using either one-time payments or subscription-based pricing.
For detailed information about Learning Program pricing options and settings, please refer to this guide.
Program player settings
In the Program Player settings, you can
- Edit the learning program navigation: Decide whether learners can move freely among the program’s courses or follow specific restrictions (available only for learning program paths).
Choose between Free navigation, Sequential navigation (available on Pro Trainer plan and above), or Navigation with prerequisites (available on the Learning Center plan and above). Find more information about this here. If you are using Sequential navigation, learners must complete the courses in the order they appear in the Program Courses tab. If you choose Navigation with prerequisites, make sure to set them up by hovering over the course you want to use as a prerequisite, clicking Edit prerequisites, and selecting whether this course will act as one or not. 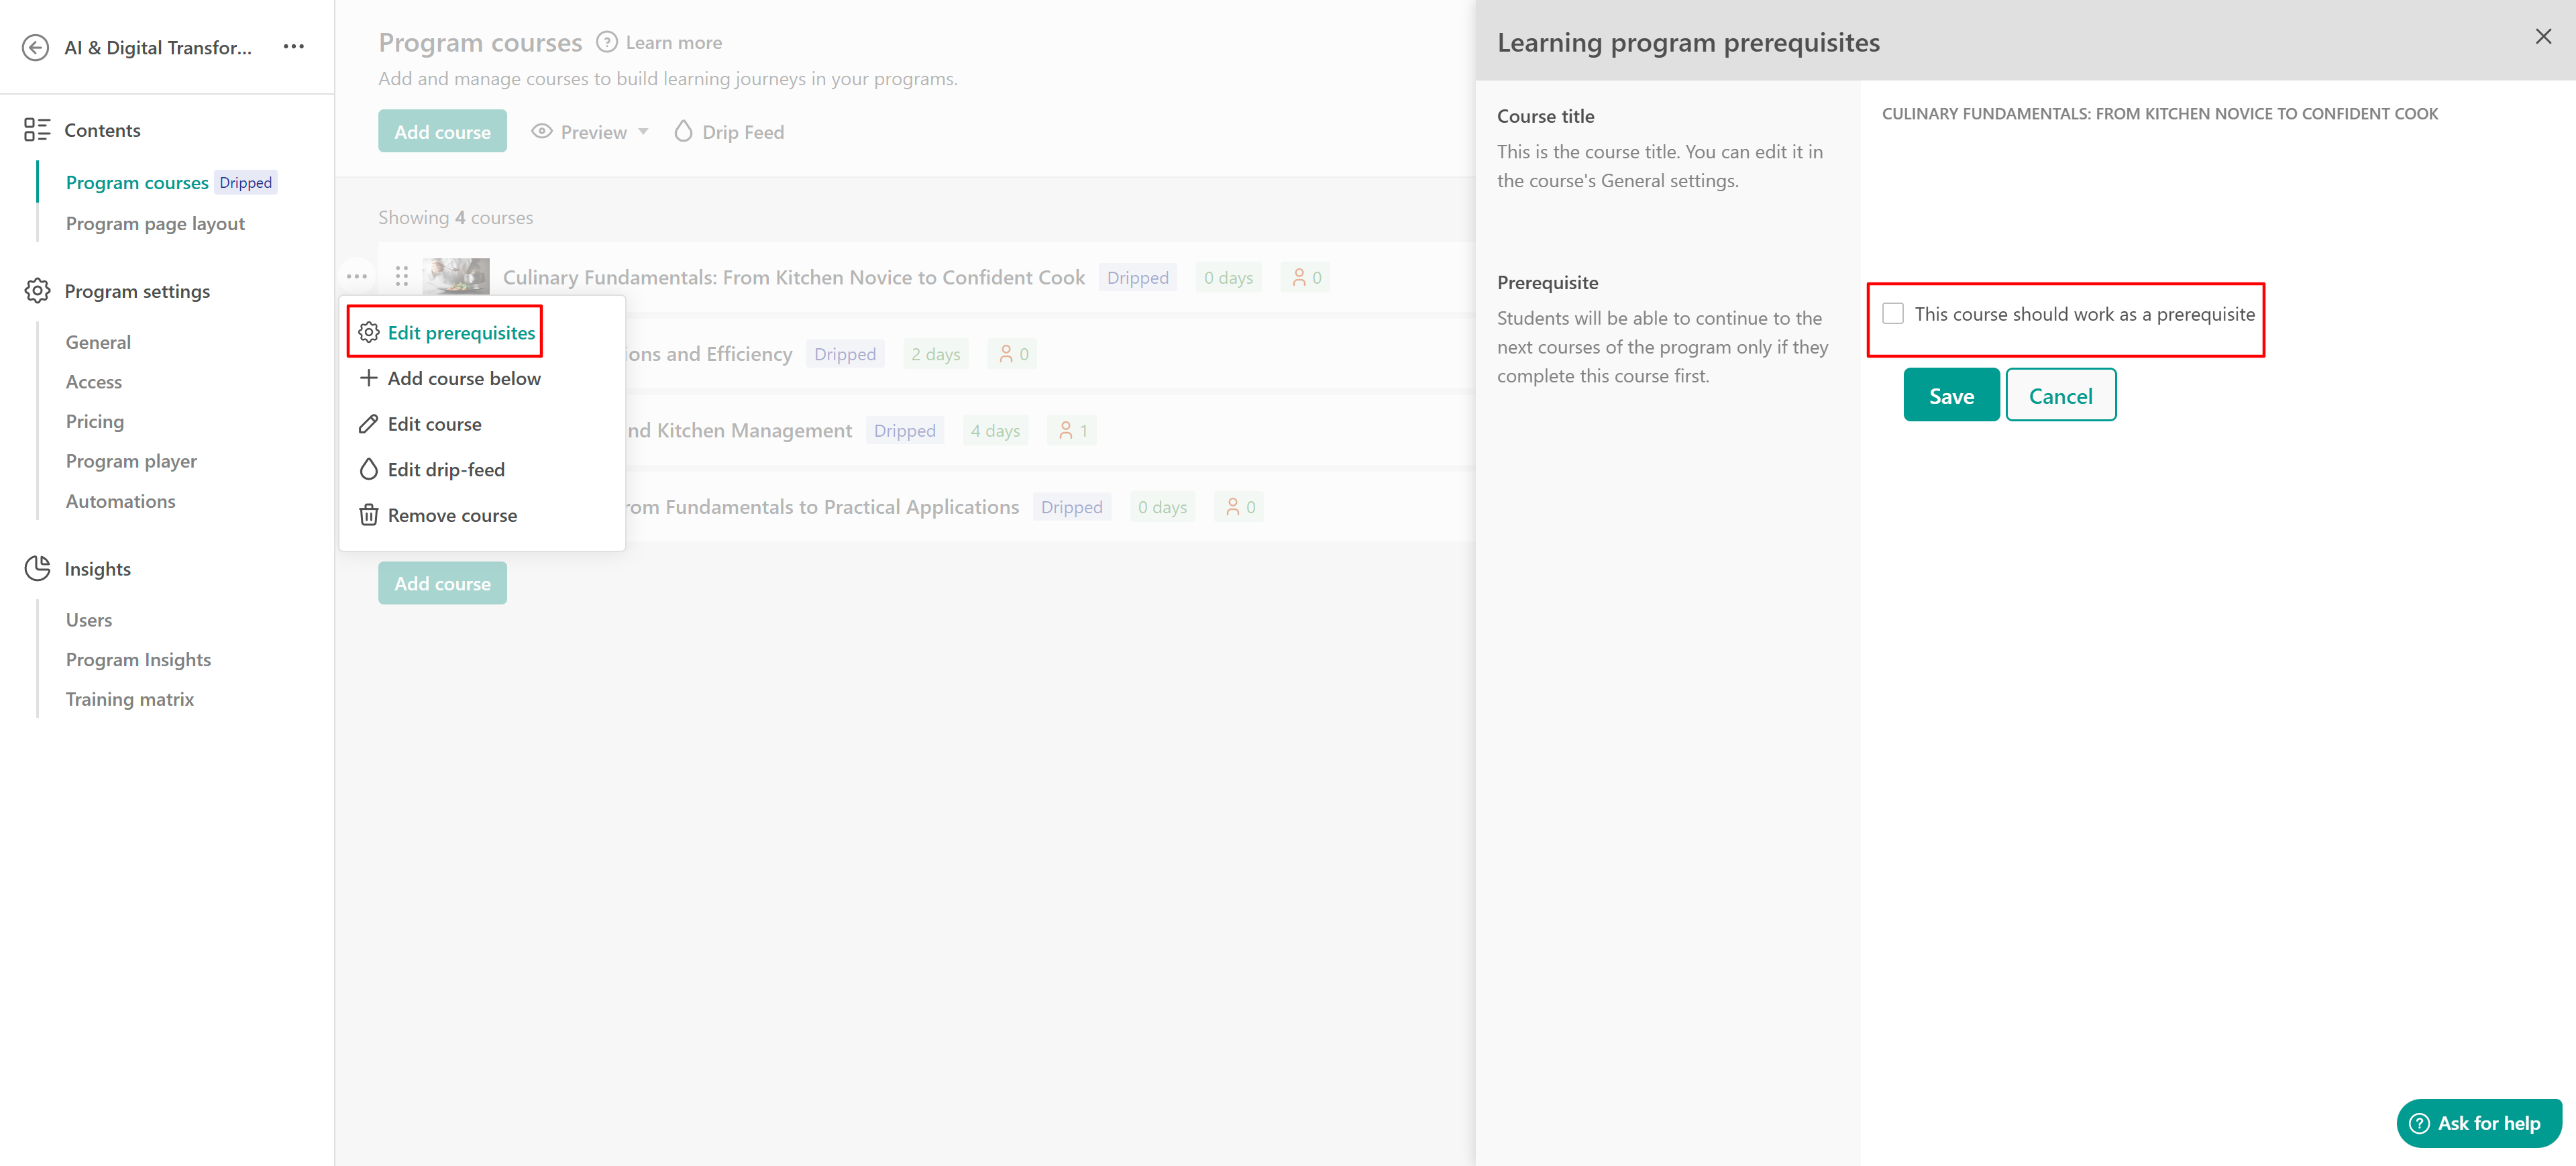
- Control the Program player “back” button behavior. Decide where users will be redirected when they click the Back button inside the Program Player. The available options are:
- No button
- Program page
- After login page
- Another page
- Specific URL
- Control the Course player “back” button. Choose where learners are redirected when they click the “Back” button while viewing a course within a program. The available options are:
- Program player
- Same as course (inherit course setting)

Automations
In this tab, you can quickly navigate to the Automation page (available on the Learning Center plan and above), where you can start creating your custom flows. For more information, be sure to check out this guide.
Insights
In this section, you can find detailed information about your program’s analytics. You can:
- View insights for individual users
- Explore program-wide performance data
- Use the Training Matrix (available on the Learning Center plan and above) for a visual progress summary
Make sure to review the tabs for in-depth insights, you can learn more about them here.